December 13, 2025
There’s something truly special about stitching words, turning a simple monogram or a meaningful quote into a piece of handmade art. Cross stitch letters let you do just that. It’s a wonderfully rewarding skill that uses just a needle, thread, and gridded fabric to bring your ideas to life in a tangible, beautiful way.
Welcome! You're about to discover a timeless craft that adds a deeply personal touch to any project you can imagine. This isn't just about following someone else's pattern; it’s about giving your own ideas a voice through thread and turning simple words into keepsakes that will be treasured for years.
The possibilities really are endless.
Picture a classic monogram stitched onto a linen hand towel for a thoughtful housewarming gift, or your favourite quote brought to life as a piece of art for your wall. Custom cross stitch letters are how you elevate everyday items into something truly special, and I’m here to walk you through every step of the creative process.
One of my favourite things about cross stitch lettering is just how versatile it is. This is a traditional skill, but it fits so beautifully into modern design, especially styles that value clean lines and handcrafted authenticity.
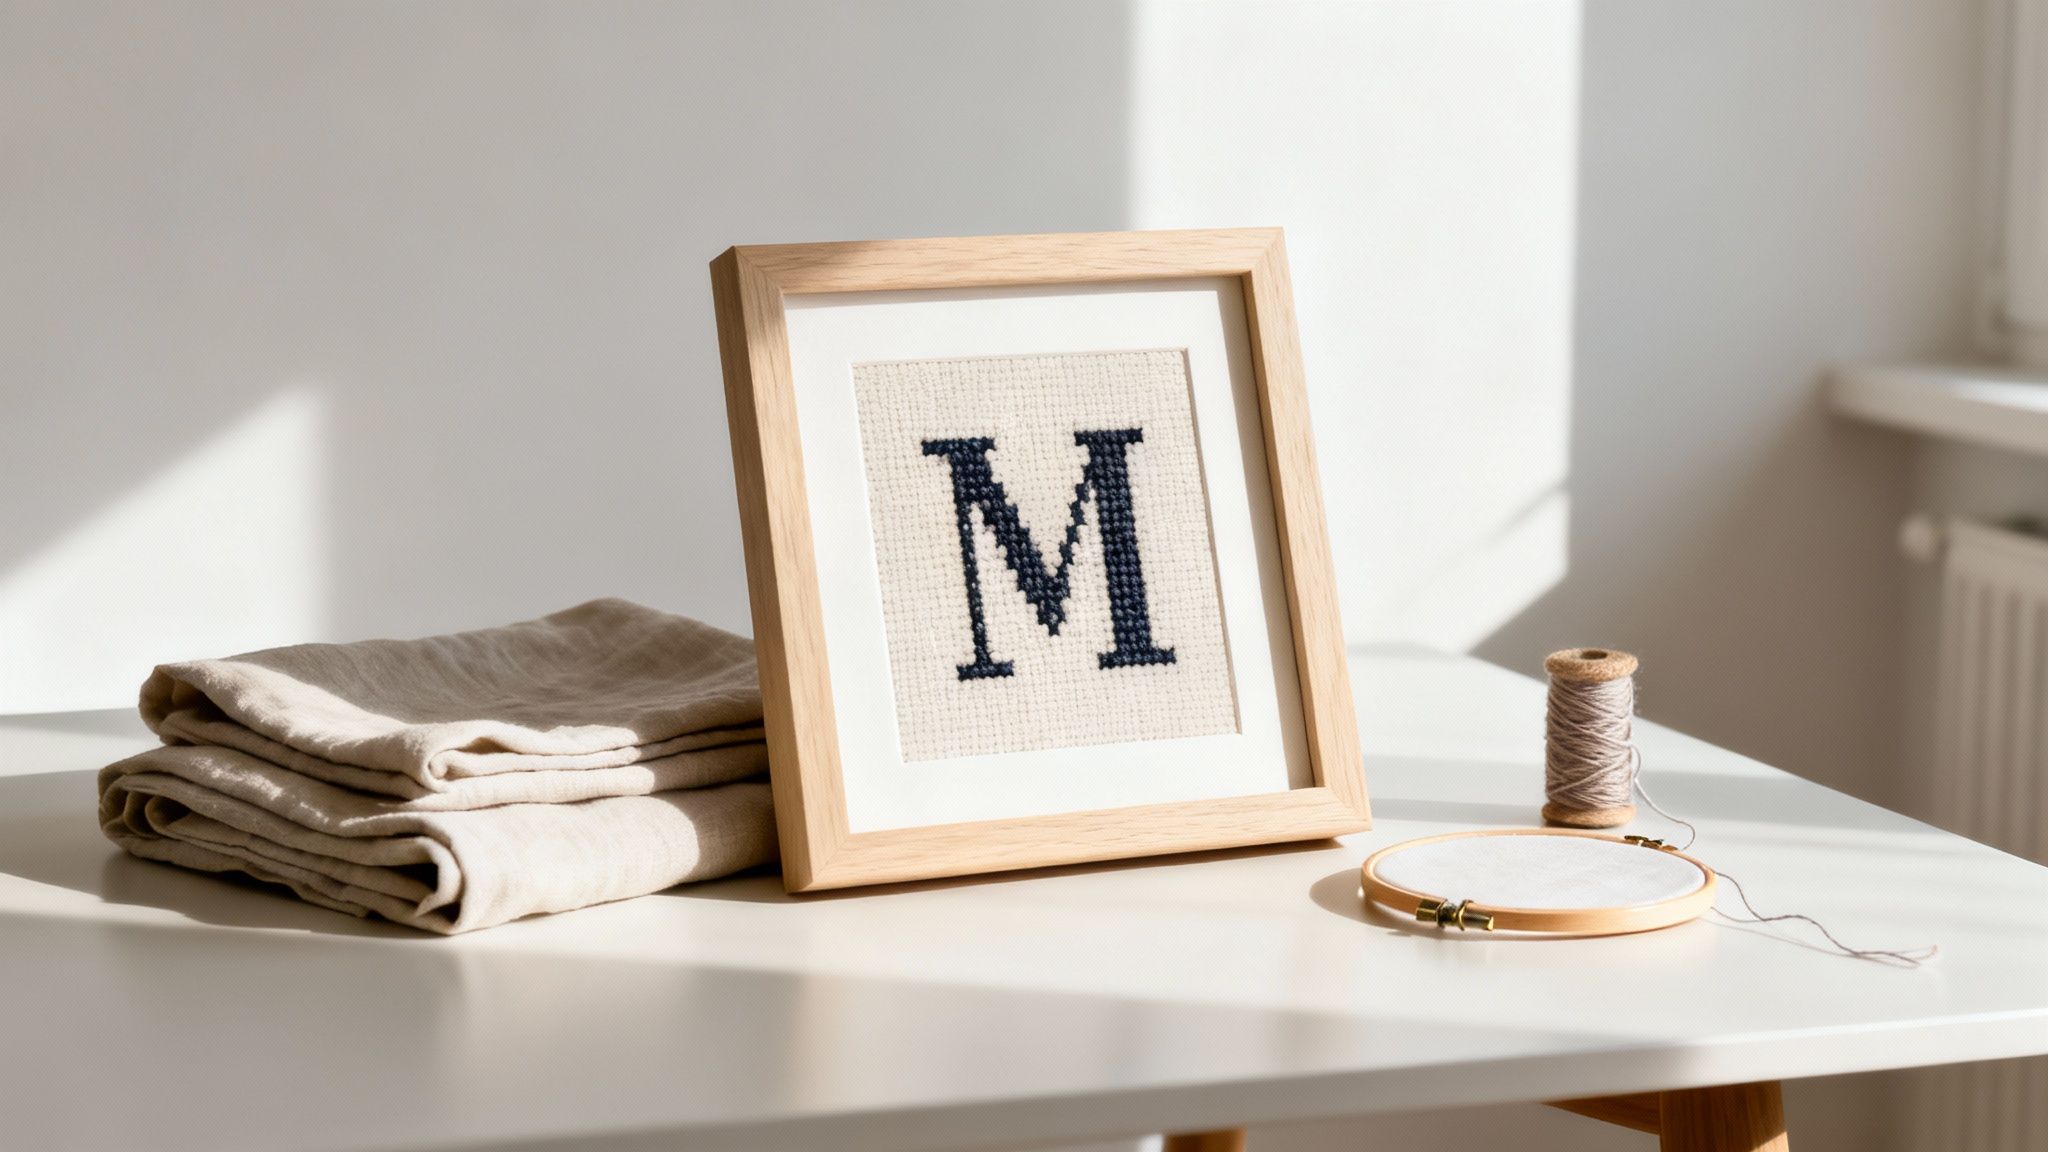
For example, a simple, bold letter stitched in a monochrome palette can become a striking piece of wall art that perfectly complements minimalist or Scandinavian decor.
The real magic happens when you pair a centuries-old craft with contemporary style. A hand-stitched phrase in a sleek, modern frame creates a focal point that is both warm and sophisticated, telling a story that is uniquely yours.
This blend of old and new is what will make your finished work feel both relevant and deeply personal.
Feeling inspired is the perfect start, but knowing you have a clear path to follow is what builds real confidence. In this guide, we'll go from the absolute basics to more advanced techniques, so you’ll feel supported at every stage.
You'll learn how to:
By the end, you'll have all the practical skills you need to tackle any lettering project you can dream up. So, let’s get ready to start stitching your own unique text and discover the joy of creating art with your own two hands.
Before you even think about threading a needle, let's talk about setting yourself up for success. Getting your tools and materials in order is probably the single most important step for any new project. Think of it like a chef prepping their ingredients—getting your toolkit sorted out first ensures your cross stitch letters will look exactly how you imagined them, and saves you a world of frustration later on.
A solid foundation makes all the difference. When you choose your supplies with a bit of thought, you can relax into the enjoyable rhythm of stitching instead of wrestling with tricky fabric or flimsy tools.
The fabric you choose is quite literally the canvas for your art, and your choice here will dramatically shape the final look of your lettering. In the cross stitch world, there are three main players, each with its own personality.
Aida Cloth: This is the go-to for most stitchers, and for good reason—especially if you're just starting out. It's a cotton fabric woven with a very clear grid of holes, which makes creating uniform, neat stitches almost effortless. It comes in different "counts," which we'll get into next.
Evenweave: Fabrics like Jobelan or Lugana fall into this category. They have a higher thread count and feel much softer than Aida. Here, you stitch "over two" threads, a technique that gives your work a more refined, delicate look perfect for fancy letter fonts.
Linen: For that truly classic, heirloom feel, linen is the premium choice. Just like evenweave, you’ll typically stitch over two threads. Linen has a natural texture with tiny slubs and variations, adding a beautiful, rustic character that can make a simple monogram feel special.
If this is your first lettering project, I can't recommend 14-count Aida cloth enough. It’s forgiving, the holes are easy to see, and it gives you a fantastic canvas for bold, clear letters without being overwhelming.
Ultimately, it comes down to the style you're after. Aida gives a crisp, modern, grid-like finish, while evenweave and linen offer a softer, more integrated background for your stitching.
You’ve probably seen fabrics labelled with numbers like 14-count, 18-count, or 28-count. Don't let that confuse you! This number simply tells you how many stitches (or squares) fit into one inch of fabric. This is the dial you'll turn to control the final size and detail of your cross stitch letters.
A lower count, like 14-count Aida, means fewer stitches per inch. This gives you larger stitches and a bigger final design. It’s perfect for pieces that need to be seen from a distance, like a welcome sign on a door.
On the other hand, a higher count, such as 18-count Aida or 32-count Linen (which works out to be the same size as 16-count Aida when you stitch over two threads), means more stitches per inch. This creates tiny, delicate stitches, allowing for much finer detail in elegant script or small monograms.
Embroidery floss is what breathes colour and life into your letters. It’s usually made of six strands of cotton twisted together. DMC is the most popular brand out there, famous for its quality and staggering range of colours. The biggest decision you'll face is simply how many of the six strands to use.
For most projects on 14-count Aida, using two strands of floss gives you lovely, full coverage without making the stitches look chunky. On higher-count fabrics like 18-count, two strands still work beautifully, but you might drop down to one strand for any delicate backstitch outlines. Don't be afraid to experiment to see what look you prefer! Planning your palette can really take your design to the next level; you can learn more about this by checking out our guide on creating a colour mixing chart.
Beyond your fabric and floss, a few key tools will make your stitching experience so much smoother and more enjoyable.
Tapestry Needles: These are your best friends. They have a blunt tip and a large eye, designed to glide through the holes in Aida without splitting the fabric threads. A size 24 needle is the perfect partner for 14-count Aida.
Embroidery Hoop or Frame: A hoop is essential for holding your fabric taut while you work. This helps you maintain even stitch tension, which is the secret to avoiding puckered fabric and making it easier to pass the needle through cleanly.
Sharp Scissors: A small, sharp pair of embroidery scissors is non-negotiable. You need them for snipping your thread cleanly and close to the fabric. This keeps the back of your work tidy and stops annoying stray threads from peeking through to the front.
Now for the fun part—turning that idea in your head into a real, stitchable pattern. This is where you get to play designer, transforming a favourite font or a spark of inspiration into a chart for your cross stitch letters. Whether you’re a fan of old-school graph paper or you prefer digital tools, charting your own alphabet is the best way to create something that’s genuinely you.
There’s something so satisfying about designing your own letters. It’s a chance to pour your own personality into a project, making sure the finished piece is a perfect reflection of your style.
First things first, you need a font. But not just any font will do. The trick is to pick one that not only looks great but also translates well to a grid. Let's be honest, some fonts just don't play nicely with the blocky nature of cross stitch. Anything too fussy or wispy can lose its charm completely.
Here are a few pointers from my own experience for picking a winner:
Think about the feeling you want your project to have. A bubbly, playful font might be perfect for stitching a child's name, while a refined serif font would look stunning as a classic monogram on a set of linen towels.
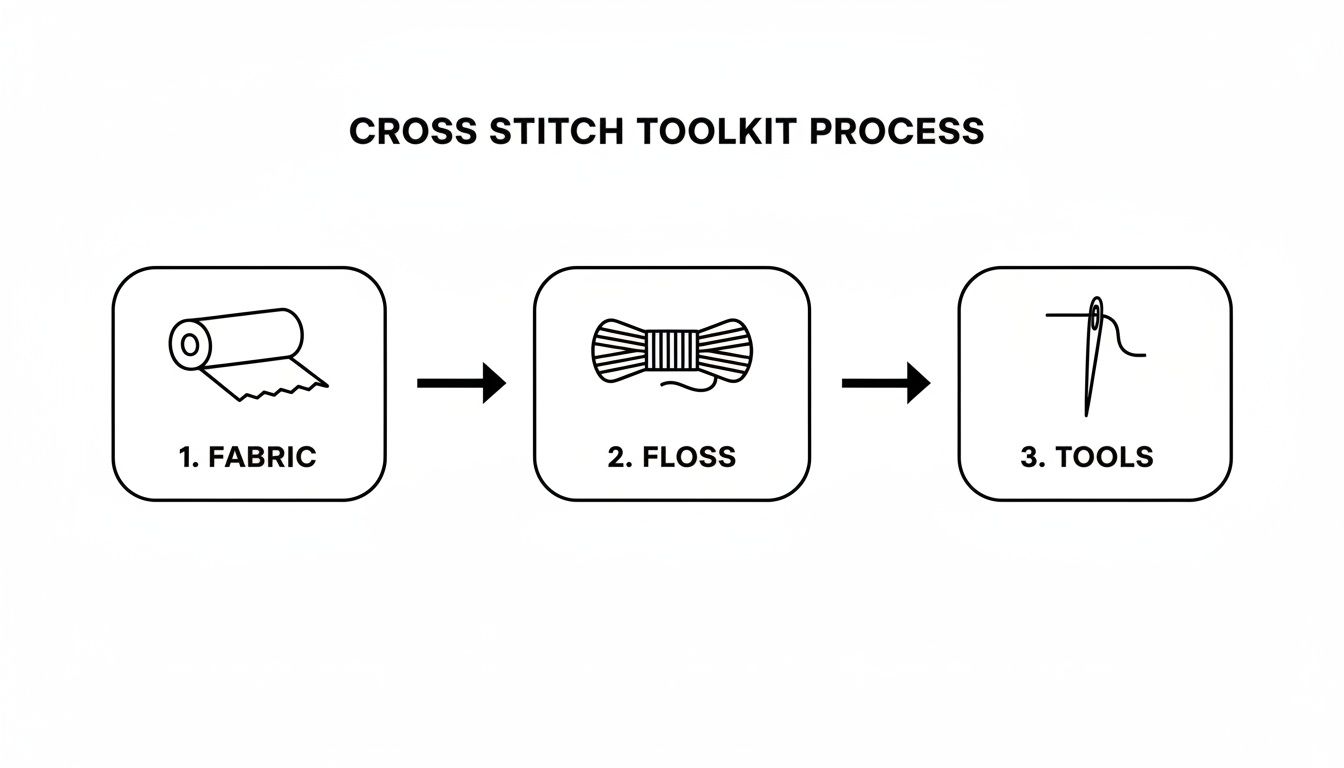
This simple infographic breaks down the process of getting your cross stitch toolkit ready.
Once you’ve settled on a font, it's time to map it out. This is the heart of creating your own pattern, where every little piece of a letter finds its home in a square on your grid—a square that will soon become a stitch. You can go completely analogue here or use some simple digital tools.
For the traditional method, all you need is some graph paper and a pencil. Seriously, that's it. Print out the letters you want to use at the size you're aiming for, lay the graph paper over the top, and start tracing the outline. From there, you just fill in the squares to best capture the shape of the letter. I love this hands-on approach; it gives you a real feel for how the letter will stitch up and complete control over the final look.
If you’re more digitally inclined, programs like Microsoft Excel or free online tools like Stitch Fiddle work brilliantly as virtual graph paper. You can even import an image of your font and use the grid to trace over it, making it super easy to experiment and undo any mistakes.
Whichever method you choose, the goal is the same: to create a clear, easy-to-follow chart where one square equals one full cross stitch. This chart becomes your roadmap for the whole project.
Sometimes, a direct one-to-one transfer from font to grid looks… a bit off. This is where the artistry comes in! The best part of designing your own cross stitch letters is that you get to make little adjustments to get them just right.
Don't be afraid to tweak the shapes. You might find you need to add an extra stitch here or there to make a curve look smoother, or maybe shift a block to make a letter like 'R' or 'B' more recognisable. The key is to step back often and look at the letter as a whole. Is it clear? Does it have the style you were going for?
This tradition of stitching letters has a fascinating global history. While cross stitch itself is ancient, the practice of stitching alphabets in Southeast Asia is more modern. Records show that while the X-stitch appeared in places like Tang dynasty China centuries ago, lettered samplers in SE Asia are closely linked to the colonial period. A huge majority, around 60–80%, of surviving lettered textiles from places like Singapore and Penang date to between 1850 and 1930, when European pattern books became widely available. You can read more about the global journey of cross stitch on Night Spirit Studio.
Okay, one last step before you thread your needle! You need to figure out the final dimensions of your text to make sure it will fit perfectly on your fabric.
First, count the number of stitches high and wide for each letter on your chart. Next, decide on the spacing. I usually find two or three blank squares between letters works well, and five or six squares is a good gap between words. Add all these counts up to get the total stitch width and height for your whole design.
To get the final size in inches, just divide the total stitch counts by your fabric count. For example, a design that is 70 stitches wide on 14-count Aida will be 5 inches wide (70 ÷ 14 = 5). This simple bit of maths saves you from any nasty surprises and ensures your beautifully designed text is perfectly centred.

With a beautifully charted pattern in hand, you're ready to translate those little squares into art. This is where the magic really begins, turning a gridded design into crisp, defined cross stitch letters. Honestly, you only need to master a few core stitches to bring any alphabet to life with real precision and style.
The process is a rhythmic and relaxing one, but a couple of key techniques will elevate your work from good to truly great. We’ll focus on the three stitches that do all the heavy lifting in lettering: the full cross, the half stitch, and the game-changing backstitch.
The full cross stitch is the heart and soul of your lettering. It’s exactly what it sounds like—a tiny 'X' made with thread that covers one square of your fabric grid. While it seems simple, the secret to getting that professional, almost-printed appearance lies in one non-negotiable rule: consistency.
Every single cross stitch is made of two diagonal stitches. For your work to have a smooth, uniform texture, the top stitch of every single 'X' must always lie in the same direction. It doesn’t matter if your top stitch goes from bottom-left to top-right ( \ ) or from bottom-right to top-left ( / ), as long as you pick one and stick with it for the entire project.
This consistency is what gives the finished piece its beautiful, light-reflecting sheen and prevents a messy, uneven look. It’s the single most impactful habit you can develop as a stitcher.
While the full cross stitch forms the main body of your letters, the half stitch is a subtle tool used for adding depth or delicate shading. It's simply the first diagonal leg of a full cross stitch.
You won't use it often for standard block letters, but it can be incredibly effective in more advanced patterns. For instance, a cursive font pattern might use half stitches to create the illusion of a softer, rounded edge or to suggest a shadow, giving the letters a more three-dimensional feel. Think of it as a way to gently fill a space without the full weight of an 'X'.
Now for the stitch that truly makes your letters pop: the backstitch. If the full cross stitch is the body, backstitching is the perfect, sharp outline that gives your cross stitch letters their final, defined shape. It’s essentially drawing with thread.
Used to outline the cross stitches, backstitching turns slightly blocky shapes into smooth, recognisable letters. This is especially true for fonts with curves or fine details.
Here’s how to achieve clean backstitching:
This technique of embellishing with thread has a rich history across many cultures. While cross-stitch has ancient roots globally, the use of lettered samplers in Southeast Asia has a more recent and documented timeline. Robust evidence shows that monogram and alphabet use in the region became prominent in the 19th century, with the oldest Peranakan examples dating from the mid-1800s. You can explore more about the global history of cross-stitch embroidery and its cultural pathways. This thoughtful outlining makes all the difference between good lettering and great lettering.
That final stitch is such a triumphant moment, isn't it? After hours of patient work, you’ve turned a simple piece of fabric into something truly personal. Now it's time for the finishing touches—the small but crucial steps that elevate your project into a polished showpiece.
Don't rush this part. Properly cleaning and pressing your cross stitch letters is what protects all your hard work. It gets rid of any oils from your hands, smooths out those stubborn hoop marks, and helps your stitches look plump and perfect before it ever meets a frame.
Think of this as a gentle spa day for your finished project. It’s earned it.
A quick, gentle wash is the best place to start. Fill a clean basin with lukewarm water and just a tiny bit of mild, colour-safe soap—a specialised quilt wash works beautifully here. Just avoid harsh detergents.
Let your piece soak for about 15-20 minutes. You can swish it around a little, but never, ever scrub or wring it out. That's a surefire way to distort your beautiful stitches. Rinse it under cool running water until it runs completely clear.
To dry it, lay the damp piece face down on a thick, clean towel. Place another towel on top and roll them up together, pressing gently to soak up the excess water. Finally, while it's still slightly damp, iron it from the back on a medium setting with no steam. Keeping that thick towel underneath gives the stitches a soft surface to sink into, making them pop without getting flattened.
With your piece clean, pressed, and looking its best, the real fun begins. A frame is a classic choice, but your stitched art has so much more potential.
The way you display your work is an extension of the art itself. It sets the tone and gives your stitched words context, turning a simple craft into a meaningful part of your home’s story.
Your cross stitch letters can be the element that ties an entire room together. A piece stitched in bold, monochrome colours can become a striking focal point in a minimalist space. If you love the appeal of handmade decor, you might find some great ideas in our guide to wood wall art ideas, which shares a similar handcrafted charm.
Using lettered embroidery in decor is a tradition with deep historical roots. In Southeast Asia, for instance, stitching alphabetic samplers became particularly prominent during the colonial period. Museum collections show that most surviving Peranakan embroidered items, many featuring initials, date from the mid-1800s onward. In fact, these items make up roughly 60–75% of the published Peranakan embroidered objects in major Southeast Asian museum holdings. You can read more about the fascinating history of Nyonya needlework on the National Library Board of Singapore's website. This long history of personalising textiles is something you're now a part of, connecting your modern project to a rich global heritage.
As you get more comfortable stitching letters, you'll naturally start asking more questions. That's a great sign—it means you're really digging in and honing your craft. Let's walk through some of the most common hurdles stitchers face, with some straightforward advice to help you perfect your lettering.
Think of these as the little secrets you pick up over time. From nailing the placement of your design to getting those outlines looking crisp and clean, these tips will help you stitch with more confidence and give every project a beautiful, professional finish.
The fabric count you pick is one of the biggest decisions you’ll make because it directly controls the final size and overall feel of your letters. There's no single "best" option; it all comes down to the look you're going for.
If you're stitching big, bold block letters or if this is your first time lettering, a lower count fabric like 14-count Aida is a fantastic choice. The larger squares make it so much easier to work with.
But if you're dreaming of a delicate, elegant script, you'll want to go with a higher count fabric. An 18-count Aida or a 28-count evenweave (where you stitch over two threads) will give you smaller, more detailed stitches that lend an heirloom quality to your work.
The key takeaway is this: the higher the fabric count, the smaller and more detailed your finished letters will be. Always consider your desired final size when making your choice.
Centring your design is absolutely essential for a polished, finished piece. Guessing is just asking for frustration, but thankfully, there’s a simple, foolproof method that works every single time.
The trick is to find the exact middle of both your pattern and your fabric.
I like to mark this spot on the fabric with a pin or a tiny dot from a water-soluble marker. Start your very first stitch right there. This little bit of prep guarantees your cross stitch letters will be perfectly placed and ready for framing.
Neat, crisp backstitching is what makes letters truly pop. If your outlines look a bit wobbly or uneven, the two things to focus on are your stitch length and thread tension.
For the cleanest lines, consistency is everything. When backstitching straight lines, try to cover no more than two squares of Aida at a time. For curves, however, the secret is to use much shorter stitches—often covering just one square at a time. This creates a smooth, flowing line instead of a jagged, blocky one.
Your tension is just as important. You don't want to pull the backstitch thread too tight, as this can pucker the fabric and make the outline look pinched. Let the stitch lie flat and relaxed against the surface. For the most delicate and sharpest outlines, I almost always use a single strand of floss. It adds just enough definition without overpowering the cross stitches themselves.
For more answers to common stitching questions, be sure to explore our complete FAQ section for additional tips and tricks.
At Dalaart, we celebrate the beauty of handcrafted traditions. Explore our collection of authentic, hand-painted Swedish Dala horses to find the perfect piece of Scandinavian folk art to complement your home. Discover our unique selection at https://dalaart.com.


.svg)


.png)


