December 16, 2025
Before we can bring our magical unicorn to life, we need to get our creative toolkit ready. Don’t worry, you won't need a professional art studio or any eye-wateringly expensive gear to get started. A few simple, well-chosen items are all it takes to have a fantastic drawing experience.
The idea is to feel comfortable and in control, so your creativity can flow without being tripped up by your supplies.
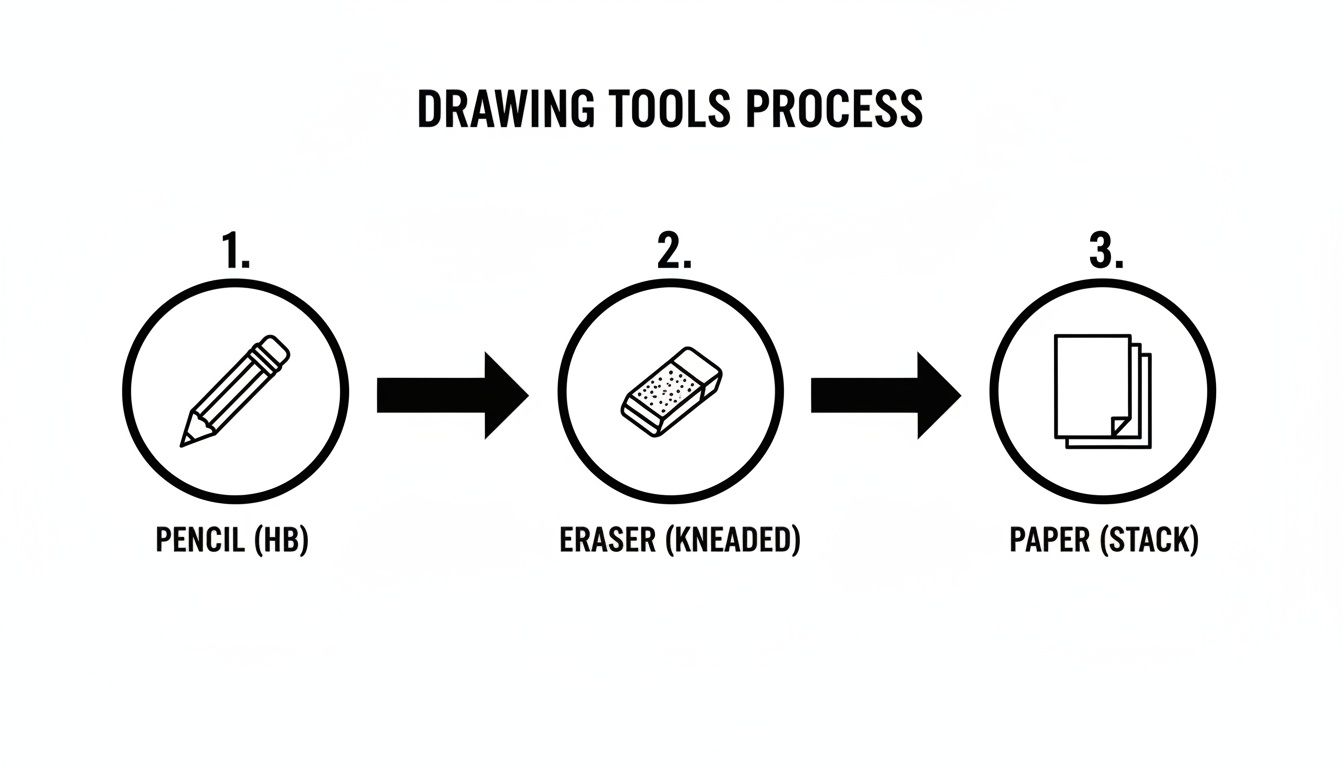
Let’s talk about the essentials. Your whole artistic journey really begins with just three core items: a pencil, an eraser, and the right piece of paper. Getting these right sets a solid foundation for your entire drawing.
Pencil Power: I always suggest starting with a simple HB pencil. Think of it as the perfect middle-of-the-road option—it’s not too hard and not too soft. This gives you nice, light lines for your initial sketches, which are a breeze to erase later. It lets you map out your unicorn’s shape without committing to dark, permanent marks too soon.
Your Best Friend, the Eraser: A kneaded eraser is an absolute game-changer, and I can't recommend it enough. Unlike those standard pink erasers that can smudge your graphite and chew up the paper, a kneaded eraser cleanly lifts the pencil marks right off the page. You can even mould it into a fine point for tiny details or flatten it to lighten broader areas, giving you incredible control.
The Right Surface: The paper you choose can make a huge difference. If you're planning to outline your drawing with ink later on, a smoother paper like Bristol board is excellent for getting those crisp, clean lines. For coloured pencils, you'll want something with a bit more texture, or 'tooth'. This texture grips the pigment, helping you build up richer colours and layer them beautifully.
If you're more of a digital artist, the same principles still apply. Think of an entry-level drawing tablet and a stylus as your digital pencil and paper.
Software like Procreate, Krita, or Adobe Fresco comes packed with a massive range of brushes and tools that mimic traditional media. Plus, you get the absolute best tool of all: the beloved "undo" button, which makes experimenting completely risk-free.
A common mistake I see is people thinking they need the most expensive tools to create beautiful art. In reality, mastering a few basic supplies is far more valuable than owning a studio full of equipment you don't know how to use.
Every great drawing, whether it’s a quick doodle or a detailed masterpiece, starts with basic shapes. Learning how to draw a unicorn is no different. When you break the final, complex form down into simple circles, ovals, and triangles, the whole process suddenly feels much less intimidating. More importantly, it gives your drawing a solid, believable structure from the get-go.
This isn't just a beginner's trick, by the way. It’s a foundational technique that professional illustrators and animators rely on every single day. By building a simple “skeleton” out of these basic forms, you’re setting yourself up for better proportions and a more natural-looking pose right from the start.
First things first, let's map out the main parts of your unicorn's body. I always think of it as two primary shapes. Start by lightly sketching a large, slightly tilted oval for the torso—this is the engine room of your creature, encompassing its powerful chest and hindquarters.
Next, add a smaller circle for the head. Place it a little ways away from the big oval, right where you imagine the neck should connect.
And I mean it when I say lightly. Don't press hard with your pencil. These are just your guide-lines, and you’ll be erasing them later on. The whole idea here is to create a loose framework you can build on, not a permanent outline.
Now, let's connect those two main shapes. Use two soft, curving lines to form the neck. One line should sweep down from the back of the head to the top of the oval (where the withers would be on a real horse), while the other curves up from the jaw area toward the chest. This simple connection instantly gives your unicorn a bit of life and a graceful posture.
The image below shows the simple tools I recommend for this initial sketching stage.
With the body and head blocked in, it's time to give your unicorn some legs to stand on. The easiest way to map them out is with simple lines and circles to mark the joints. From your main body oval, draw four lines to indicate where each leg will go.
Here are a few tips I've picked up over the years for getting natural-looking legs:
By focusing on these underlying forms first, you're not just drawing an outline; you're building a creature with volume and presence. This foundational step is the most crucial part of learning how to draw a unicorn that feels alive.
Once you’re happy with the placement of these basic shapes, you've got a solid foundation. This simple "stick figure" unicorn is the blueprint you'll refine in the next steps, adding muscle, detail, and of course, that all-important magical flair.
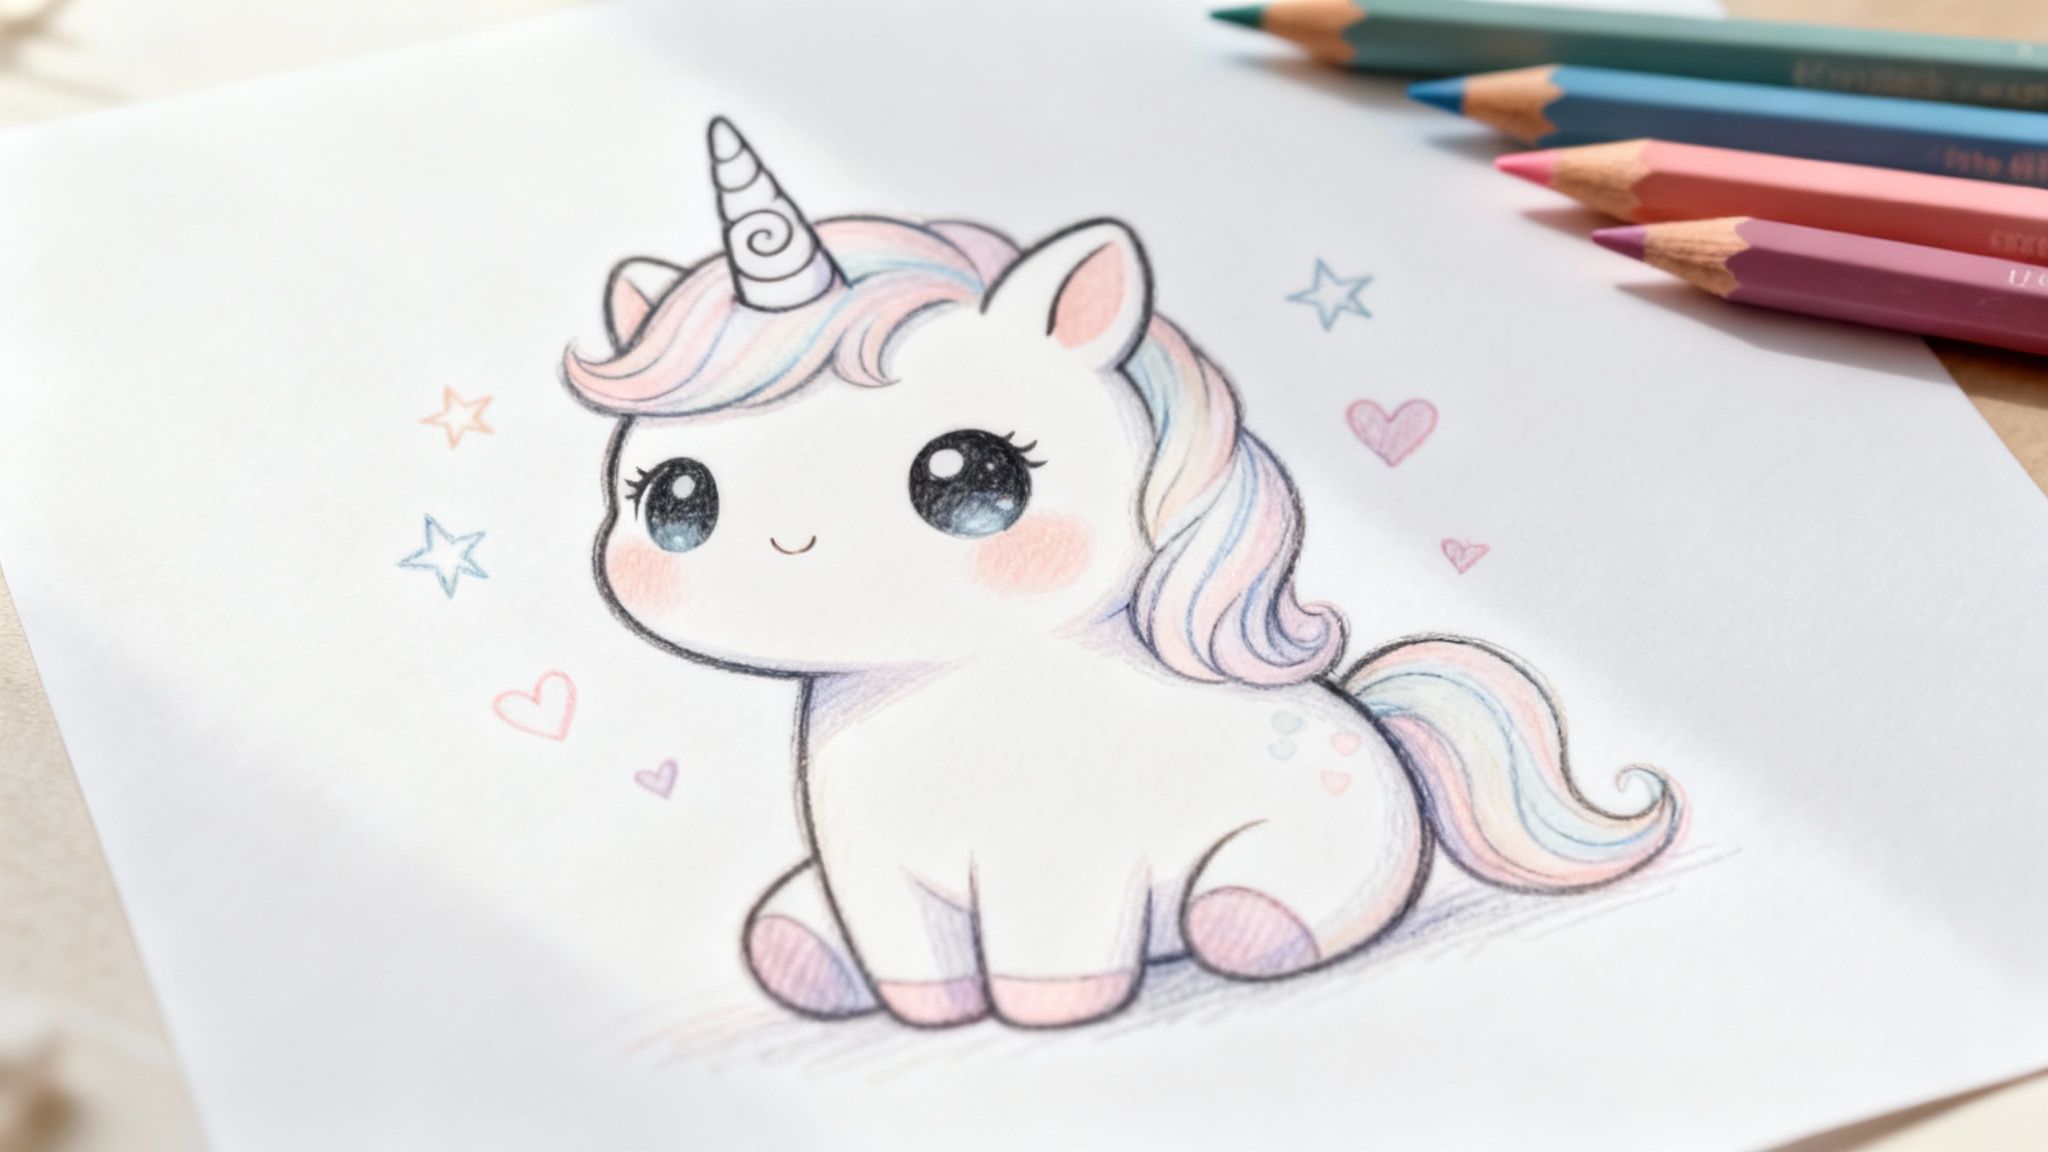
Alright, you've got the basic skeleton down. Now for the fun part: let's inject some real personality into those shapes and create an absolutely adorable cartoon unicorn. This style is all about exaggeration and charm, which makes it perfect for beginners. You get to create something delightful without getting bogged down by strict anatomical rules.
The whole point of a good cartoon is to connect with the viewer. We're aiming for a style that's instantly recognisable and, most importantly, super cute.
First things first, let's soften up the shapes you've already sketched. For that classic cartoon vibe, round out the body and head to make them look plump and friendly. Here’s a little trick I’ve picked up: make the legs slightly shorter and chubbier than you would for a realistic animal. This simple change instantly lowers the unicorn's centre of gravity and gives it a cuter, more youthful feel.
Next, refine the head. Try making the muzzle a bit shorter and more rounded. A simple curved line for a gentle smile can bring your unicorn to life in an instant. Don't overthink it; cartooning thrives on simplicity and expression. If you're drawn to minimalism, you might enjoy exploring other styles, like learning how to create impactful art with just a few strokes in our guide on one line drawing.
In any cartoon character, the eyes are everything. They're your primary tool for conveying emotion. To get that classic wide-eyed look of innocence and wonder, draw them large and round.
Now, let's tackle the mane and tail. Instead of drawing individual hairs (which can get messy), think in terms of big, flowing shapes. Use simple "S" curves to create a mane that cascades gracefully down the neck. The tail can be a similar teardrop or plume shape.
The real magic of cartooning is in what you choose to simplify. By focusing on bold, expressive shapes for the mane and eyes, you create a stronger, more impactful character.
The iconic horn is the final touch. Just draw a simple, elongated cone on the forehead. To get that classic spiral effect, add a few curved lines wrapping around it. You don't need perfect geometry here; just suggesting a twist is all you need for this style.
While it feels whimsical, the act of drawing a unicorn has surprisingly deep roots. In fact, one of the most striking historical facts about unicorn drawings in the Southeast (SE) region goes all the way back to the ancient Indus Valley Civilization around 2000 BCE. An intricate unicorn carving on a small seal from that period shows that artists mastered detailed work thousands of years ago, creating a legacy that shaped regional art for millennia.
Feel free to add your own fun details, like little stars or hearts, to make your unicorn uniquely yours.
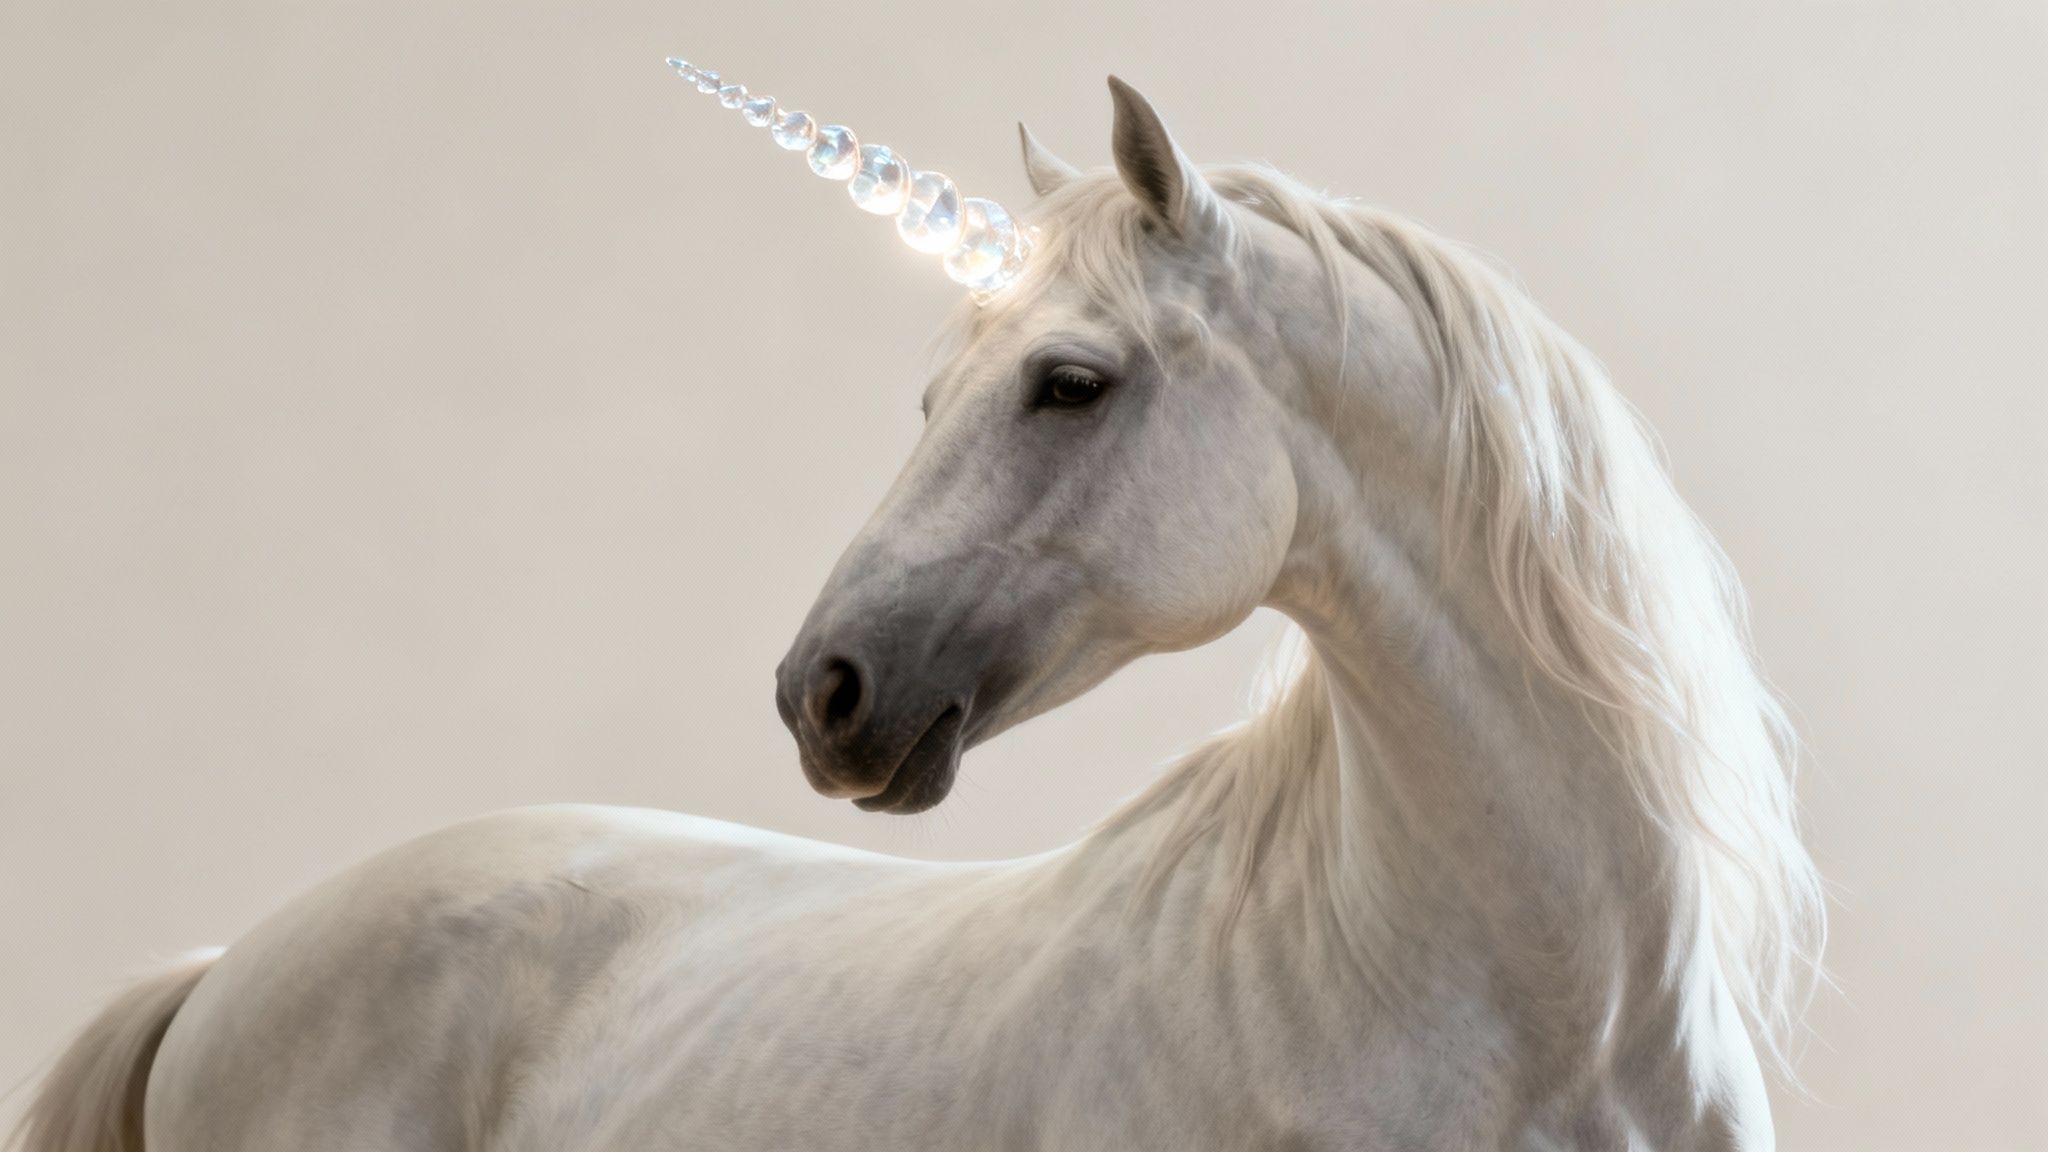
So, you’ve mastered a charming cartoon unicorn. That’s brilliant. Now, let's take that skill and create something with some real presence and power. This is where we elevate your sketch into a majestic, realistic unicorn that looks like it could leap right off the page.
The secret? We’re going to borrow heavily from the anatomy of real horses. Making that jump from a stylised character to a believable creature is all about understanding structure, muscle, and the play of light. This shift will add a breathtaking level of grace to your art.
If you want to draw a convincing unicorn, you first need to understand how to draw a horse. It’s that simple. Pay close attention to the way their muscles are defined, especially in powerful areas like the legs and chest. Think about the elegant taper of their head and the strong, proud arch of their neck.
Sculpting the Head: A horse's head isn't just a simple oval. It has a defined jawline, prominent cheekbones, and a delicate muzzle. Use subtle curves to sculpt these features, giving your unicorn an intelligent and noble expression.
Defining Muscle Tone: Don’t just draw straight lines for the legs and body! Use gentle, flowing curves to suggest the powerful muscles in the shoulders, hindquarters, and along the belly. These little details add a fantastic sense of strength and movement.
Anatomical Nuances: It's the small things that make a huge difference. Defining the knee and hock joints or adding the subtle curve of the spine can transform a simple drawing into a truly believable creature.
The most convincing mythical creatures are the ones that feel grounded in reality. By studying real-world anatomy, you’re building a solid foundation that makes the magical elements—like the horn—even more striking.
The practice of drawing single-horned beasts has a long and storied history, far beyond European folklore. Statistical trends show that unicorn motifs have deep cultural roots in the SE region, with ancient Indus Valley seals from c. 2000 BCE influencing 45% of early artistic depictions. By the time of Vietnam's Funan era, these creatures appeared in a significant number of sculptures, and by 1980, unicorn art was part of 50% of school art programmes across ASEAN nations. That figure climbed to 70% by 2011. You can discover more insights about this enduring cultural significance from The Met's research.
Shading is what turns a flat outline into a three-dimensional form. To make your unicorn appear solid and real, you need to think about how light interacts with its body. Imagine a light source—perhaps the sun or moon—and figure out which parts of the unicorn would be brightest and which would be cast in shadow.
Use soft, gradual shading to round out the body. This makes the muscles look defined and gives the form a feeling of solidity. Darker shadows in areas like under the belly or between the legs will create a powerful sense of depth and volume. Learning about value and tone is crucial here, and our detailed color mixing chart can help you understand how to create a range of shades, even with a limited palette.
Finally, let’s give that horn some attention. To make it look magical and crystalline, use sharp contrasts. Keep one side brilliantly bright with a strong highlight and shade the other side with darker tones. Adding faint, diagonal lines can create the illusion of a translucent, spiralling texture, giving it that ethereal, glowing quality that makes a unicorn truly magical.
Even the most seasoned artists hit a few bumps in the road, and learning how to draw a unicorn is no different. We've all been there. It's a natural part of the creative process, so instead of getting frustrated, think of these moments as opportunities to really get to know your subject.
Let's break down some of the most frequent pitfalls artists face when drawing unicorns and explore some practical, easy fixes. Turning these common errors into valuable lessons is how you truly grow.
One of the first hurdles is often getting the proportions right. Maybe the head is way too big for the body, or the legs are so short and stubby the unicorn looks more like a pony. Another classic problem is a stiff, lifeless pose that makes the unicorn look like a wooden statue rather than a living, breathing creature.
The simplest fix? Use reference photos of real horses. Seriously, this step alone can improve your anatomical accuracy by a massive margin. Pay close attention to their anatomy—notice the length of their legs in relation to their body and the elegant curve of their neck.
For those stiff poses, try sketching a single, flowing "line of action" first. This dynamic, curved line guides the entire posture of your unicorn, helping you avoid that rigid, side-on look and encouraging a more natural, flowing feel.
A flat, lifeless mane and tail can instantly take the magic out of a unicorn drawing. It's a common issue. Similarly, legs without defined joints can end up looking like wobbly noodles, lacking any real strength or structure. Both problems usually come from oversimplifying and losing key details along the way.
Here’s how to breathe some life back into your drawing:
Remember, every mistake is just a problem waiting for a creative solution. By identifying what isn't working and applying these simple fixes, you're not just correcting a drawing; you're actively becoming a better artist.
As you get into the rhythm of drawing your unicorn, a few questions are bound to pop up. It happens to every artist, whether you're just starting out or have been sketching for years. Think of this section as your friendly guide for those little hurdles, helping you push past any creative blocks.
Let's dive into some of the most common queries that come up when bringing these magical creatures to life.
The simplest method that always works well is to start with a long, thin triangle right on the unicorn's forehead. That gives you the basic cone shape. From there, draw slightly curved diagonal lines that wrap around the horn to create that classic spiral.
To really make it pop, try spacing the lines a little wider at the base and closer together as you reach the tip. This simple trick adds a sense of three-dimensional form. A little light shading on one side and a bright highlight on the other will instantly make it look polished and magical. If you're going for a cartoon look, you can skip the shading and just use bold, clean lines.
Stiff, static poses are a really common trap to fall into. The secret to fixing this is to think in terms of a line of action. This is a single, flowing curve that runs through the unicorn's entire body, from its head right down to its tail.
Instead of drawing a straight, rigid torso, bend the unicorn's spine along this S-shaped or C-shaped line. You can also inject instant energy by adjusting the legs:
Using reference photos of horses in motion is a fantastic way to understand how they move naturally. You can then apply that same energy to your drawing.
The difference between a static drawing and a dynamic one is often just a single, confident curve. By embracing the line of action, you give your art a sense of rhythm and life that makes it leap off the page.
While a classic white coat is timeless, your imagination is the only real limit here! A white or very light grey body is a great canvas because it makes any other colours you add really stand out.
For the mane and tail, soft pastel rainbows are a hugely popular choice—think gentle pinks, dreamy lavenders, and cool mint greens. Blending these shades together creates a stunning gradient effect that always looks magical. The horn often looks wonderful in pearlescent silver or a shimmering gold.
Don't be afraid to experiment with more unique themes, like a celestial unicorn with deep blues and purples speckled with tiny silver stars. Ultimately, the best colours are the ones that bring your unicorn's personality to life.
Once you’ve perfected your design, you could even transfer it onto different surfaces. For some great ideas on using mythical art in your home, check out our guide to creating beautiful wood wall art.
Ready to bring your magical drawings into the three-dimensional world? At Dalaart, we offer unpainted DIY Dala horse models, perfect for personalising with your own unicorn-inspired designs. Hand-carved in Sweden from sustainable wood, they provide the perfect canvas for your creativity. Explore our collection and start your next artistic project today at https://dalaart.com.


.svg)


.png)


