March 30, 2026
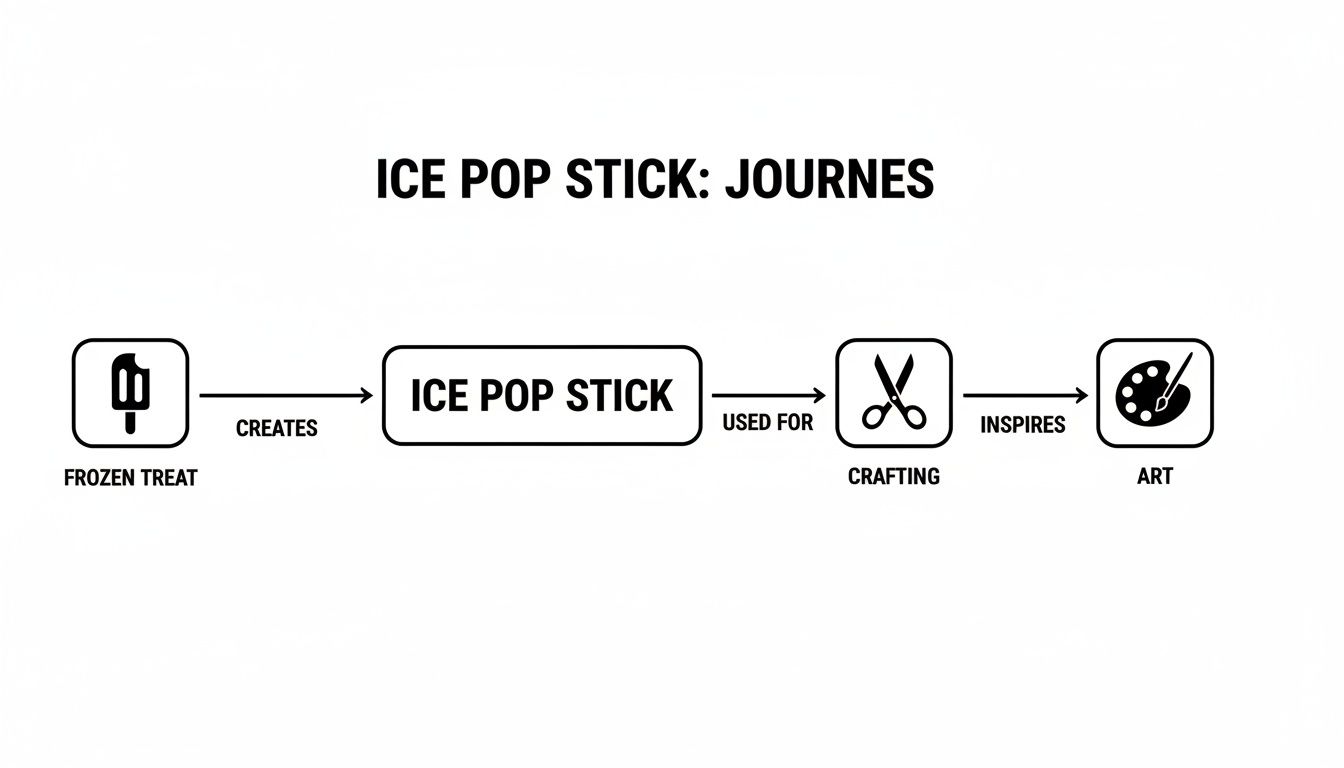
That simple wooden stick, often left behind after a summer treat, holds an almost unbelievable amount of creative potential. It's so much more than a holder for a frozen dessert; it’s a versatile crafting treasure just waiting for its second life. This guide will reveal how these everyday ice pop sticks can become the foundation for beautiful art, functional home décor, and wonderfully intricate designs.
The journey an ice pop stick takes, from a disposable item to a prized crafting material, truly bridges two different worlds. Originally designed for the food industry, these small wooden planks are now a staple for creators and hobbyists. Their simple, uniform shape makes them a perfect building block—much like a single brushstroke in a larger painting. On its own, it’s just a mark, but together, these strokes can create a masterpiece.
This guide is about seeing beyond the stick’s humble origins. We'll connect this everyday object to the clean, sophisticated lines of Scandinavian design, revealing a surprising elegance you might not expect. For instance, you will learn how to transform a bundle of sticks into the minimalist geometric patterns so popular in modern home décor. You can find more inspiration for incorporating these kinds of elements by exploring ideas for stylish wood wall decor.
Embracing the true potential of ice pop sticks really comes down to shifting your perspective. Instead of seeing something to be thrown away, you begin to see a world of opportunity. This transformation, from a common object into a work of art, is at the heart of creative reuse and sustainability, elevating a simple material through skill and imagination.
Just think of the key possibilities:
The real magic happens when you stop seeing an "ice pop stick" and start seeing a plank, a beam, or a tile. It's about recognising the raw material's potential, a mindset central to both Scandinavian folk art and modern DIY culture.
Our journey will guide you from these foundational concepts to mastering more advanced crafting techniques. Prepare to be inspired as we unlock the creative power held within this small, unassuming piece of wood.
Before you even think about uncapping the glue or dipping a brush in paint, every great artist first gets to know their medium. It helps to think of an ice pop stick as a tiny, humble plank of wood—a miniature canvas with its own character and potential. These sticks are most often made from birch, a wood chosen not just for its food-safe qualities but also for its wonderfully smooth surface and tight grain.
This choice of wood is no accident, and it has a huge impact on how your final project will look and feel. Birch is a hardwood with a fine, even texture, which means it takes paint beautifully and won't splinter easily when you cut it. For anyone aiming for a clean, professional finish, that quality is non-negotiable.
This simple journey from a functional food item to a cornerstone of crafting and art is really quite something.
It’s a perfect illustration of how something so simple can become the foundation for everything from a child’s weekend project to a sophisticated piece of art, showcasing its incredible versatility.
As any seasoned crafter will tell you, not all ice pop sticks are the same. Picking the right size and shape is one of the first, most important decisions you’ll make, as it dictates the scale and sturdiness of your creation.
But it’s not just about size. While most sticks feature those familiar rounded ends, keep an eye out for more specialised shapes. Some have wavy edges, and others come to a point. These little variations can bring a unique decorative touch to your work right from the start, opening up all sorts of new creative ideas.
The real secret to a polished, professional-looking piece is consistency. When you're buying sticks, always look for packs where the sticks are uniform in thickness, width, and colour. It's this small detail that makes a project look cohesive and intentional, not just cobbled together.
Learning to spot a high-quality stick is a skill that will pay you back tenfold, ensuring your projects are beautiful and built to last. Before you head to the checkout, take a second to really look at the pack. The best crafting sticks will have smooth, sanded edges without any nasty splinters and a consistent, pale wood colour.
Try to avoid packs with sticks that are obviously warped, discoloured, or have rough, frayed edges. These little flaws can be a real headache during assembly and can easily spoil the final look and strength of your piece. Spending a little bit more on better quality ice pop sticks is always worth it. It saves you so much frustration and lets you focus on the fun part—the creativity—while guaranteeing a result you can be proud of.
Right then, let's talk about sourcing. Finding the perfect materials is a craft in and of itself, and when it comes to ice pop sticks, this first step is what sets the stage for a polished, professional-looking project. More than just hunting for a bargain, this is a wonderful chance to make more conscious, eco-friendly choices with your art.
Choosing sustainable materials simply feels good. It aligns your creative hobby with a healthier planet, turning a personal pleasure into a small but meaningful contribution. It often means looking beyond the standard big-box store offerings and seeking out suppliers who genuinely prioritise responsible forestry and recycled materials.
Your quest for the perfect ice pop stick will likely take you to a few different places, and each has its own perks. Knowing where to look helps you strike the ideal balance between quality, quantity, and ethical sourcing for whatever you have in mind.
Here’s where I typically look for my supplies:
The most significant shift I've seen in crafting lately is this move towards conscious creation. By actively seeking out FSC-certified wood or sticks made from recycled materials, you’re sending a clear message and supporting businesses committed to sustainable practices.
This push for sustainability isn't just a niche trend; it's a powerful wave of consumer awareness that is reshaping markets everywhere, and craft supplies are no exception. The demand for greener products is driving a real shift in how ice pop sticks are made.
Take the vibrant Southeast Asian region, for example. The market has seen explosive growth, with a stunning 40% of sticks now being sourced from recycled or plantation-grown wood. This move is being spurred on by new regulations, like those in Malaysia, which are mandating 30% recycled content by 2028. You can really get into the weeds on these market dynamics at Market Report Analytics if you're curious.
The secret to turning a simple bundle of ice pop sticks into a polished work of art lies in the preparation. Taking a few moments to properly prepare your canvas, so to speak, is what separates a charming home craft from a truly beautiful piece that looks professional and is made to last.
This all begins with the surface. Even high-quality sticks can have slight imperfections or a touch of "fuzz" left over from the cutting process. A quick, gentle sanding is the simple trick to achieving a flawless result.
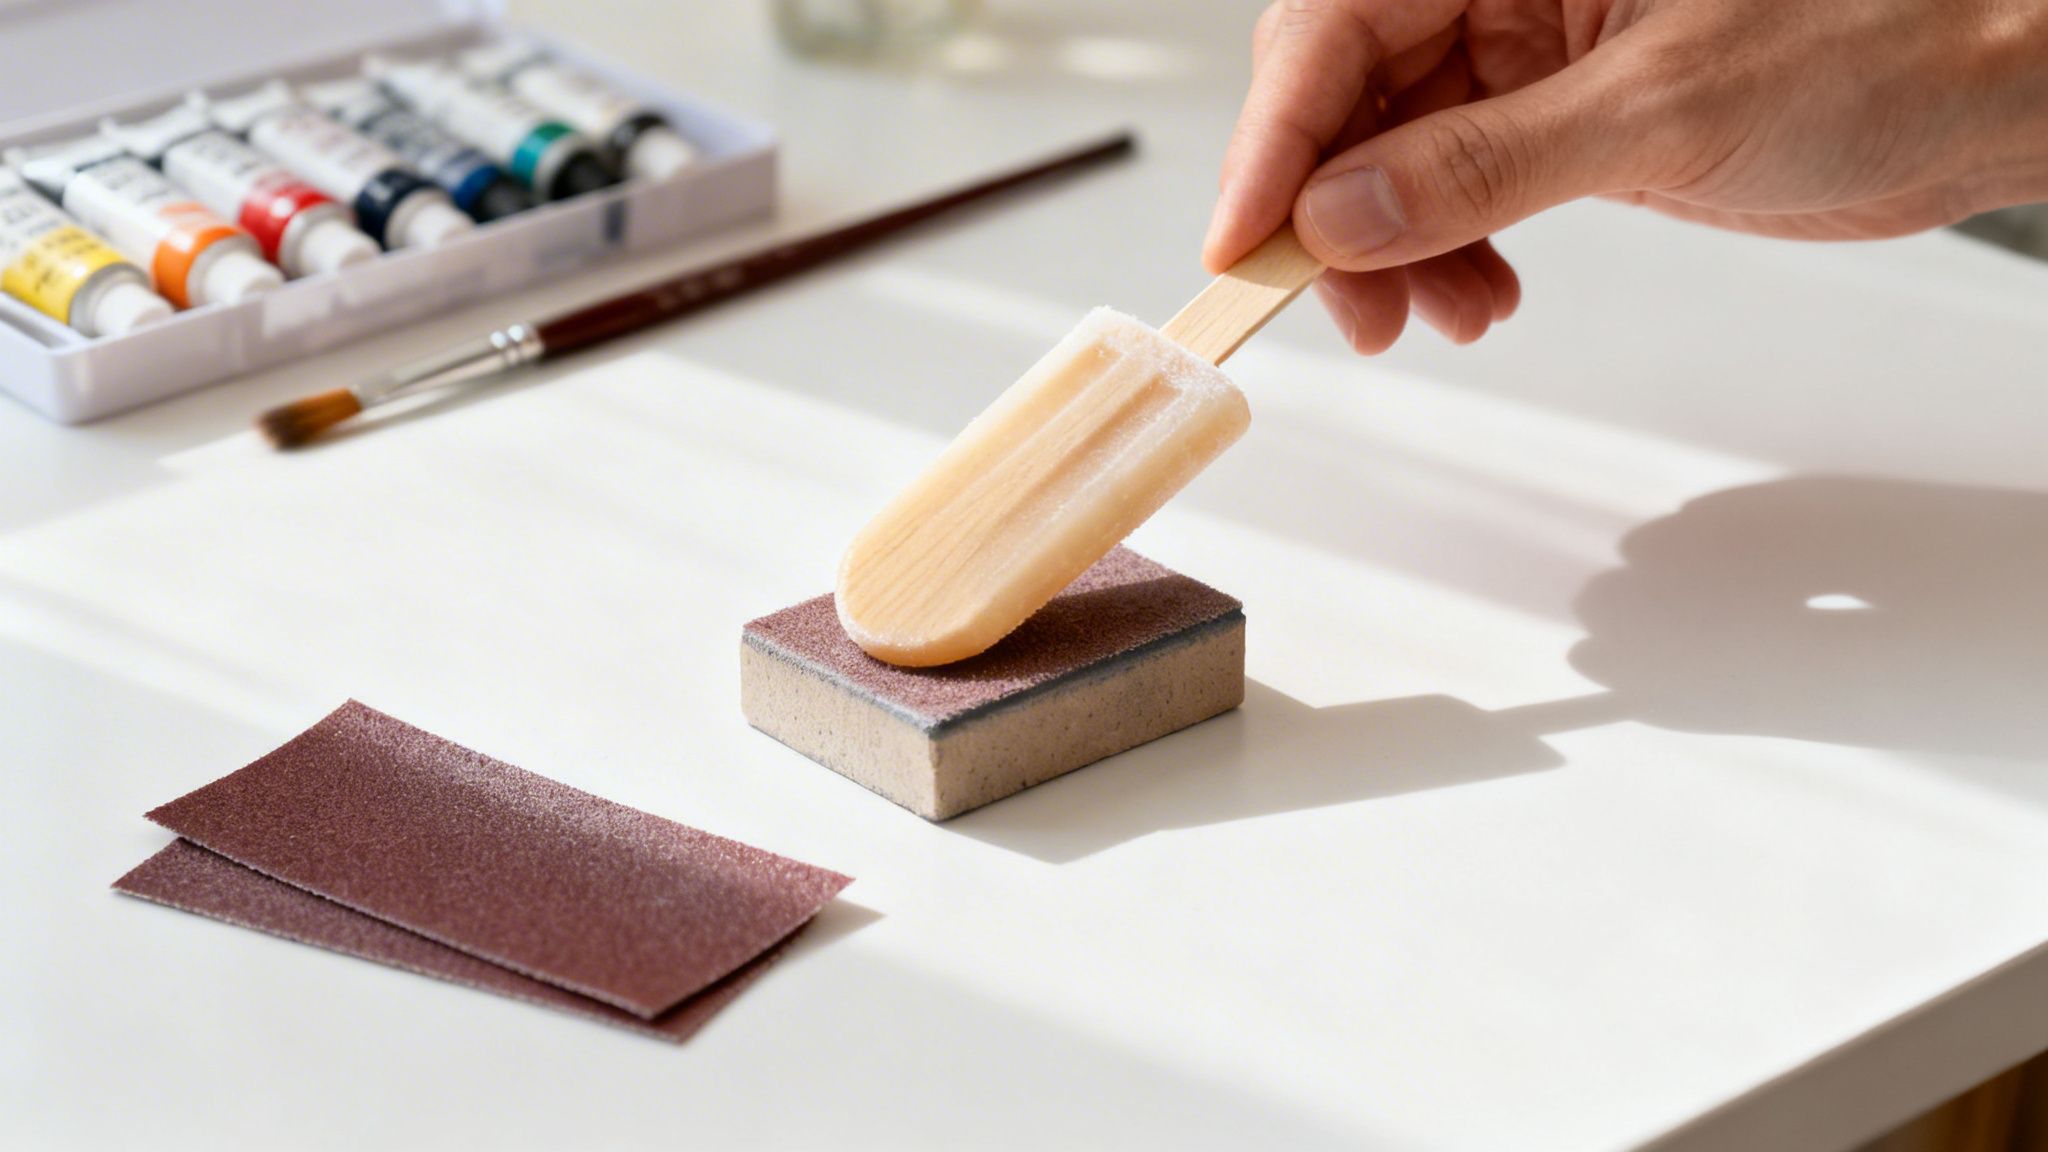
Just grab a fine-grit sandpaper—something around 220-grit is perfect for this—and lightly smooth over all the surfaces of the stick. The goal isn’t to reshape the wood, but simply to knock down any tiny fibres. This creates a silky base that will accept paint beautifully.
With your sticks perfectly smooth, it’s time to prime. This is a step many people are tempted to skip, but it’s truly the key to getting vibrant, consistent colour. Wood is porous by nature and will drink up paint like a sponge, which often leads to a blotchy or uneven finish.
A thin coat of primer seals the wood's pores, creating a uniform, non-absorbent base. This allows the true colour of your paint to pop, and you’ll find you need fewer coats to get that rich, opaque look you’re after. It’s a little bit of effort that saves you time and paint later on.
For ice pop sticks, a white or light grey acrylic gesso is an excellent choice. Brush on a thin, even layer and let it dry completely, following the manufacturer’s guidelines.
Now for the best part—adding colour! With your sticks sanded and primed, they are ready to be transformed. The type of paint you select will set the entire mood for your project.
For a flawlessly smooth coat, use a small, flat-tipped synthetic brush. The trick is to apply the paint in thin, even layers, allowing each one to dry completely before you add the next. This prevents streaks and builds up a much more durable, professional-looking surface.
Once you master these finishing techniques, you can play with endless colour combinations. To get started blending your own unique shades, take a look at our guide for creating a versatile colour mixing chart. It’s the perfect resource for developing a signature palette for all your craft projects.
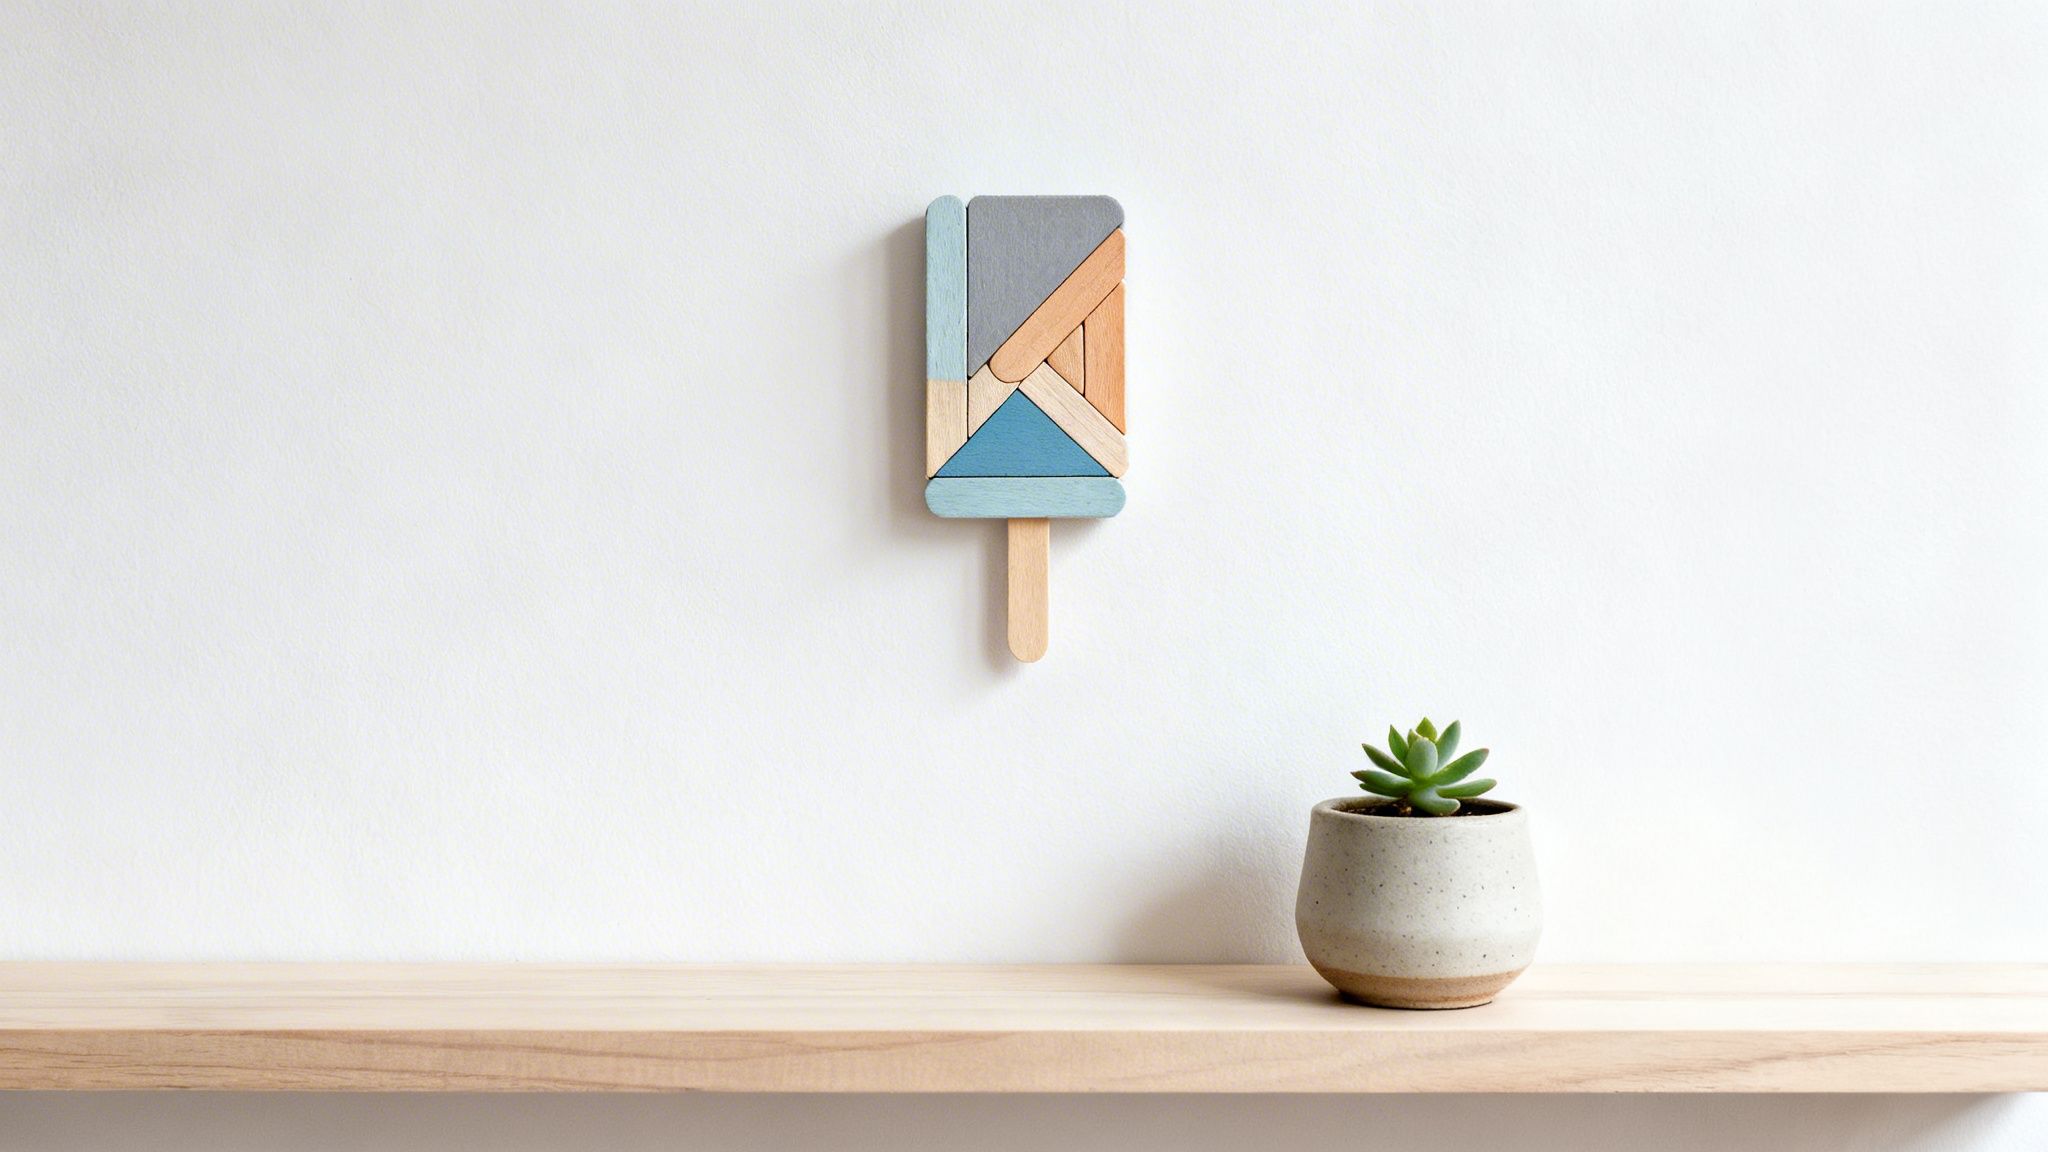
Now that your ice pop sticks are perfectly prepped and painted, it’s time to explore their creative possibilities. The simple craft stick is a wonderfully versatile material for creating elegant home décor, especially when you draw inspiration from the clean, minimalist principles of Scandinavian design. This style truly celebrates simplicity, natural materials, and beautiful functionality.
You don't need complex or intimidating plans. The real beauty of crafting with ice pop sticks is how simple arrangements can lead to stunningly sophisticated results. We'll begin with a few easy ideas and build from there, showing you how to turn a handful of sticks into art you’ll be proud to display in your home.
One of the easiest yet most charming projects you can start with is creating your own custom plant markers. It’s a perfect entry-level craft that instantly adds a personal touch to an indoor herb garden or potted plants, blending usefulness with style.
Simply take your prepared ice pop sticks and paint them in a muted Scandinavian colour palette—think soft greys, clean whites, deep blues, or earthy, natural tones. Once they are dry, use a fine-point permanent marker to write the plant names in a simple, elegant script. For an extra decorative touch, you could add small geometric patterns at the top of each stick.
This is where you can truly start to see the intersection of humble craft sticks and modern interior design. By gluing sticks together, you can form striking geometric shapes like hexagons, triangles, and squares. These can then be arranged into a larger, honeycomb-style piece of wall art.
Think of each stick as a single line in a drawing. By combining these lines, you can create intricate patterns and forms. The key is to maintain clean lines and a simple colour scheme to let the geometric shapes become the focus.
This method works beautifully for creating stylish coasters or trivets, too. By arranging the sticks in different patterns and securing them to a cork or felt backing, you can craft functional items that double as beautiful decorative objects for your home.
For a project with a more traditional Scandinavian folk-art feel, consider building miniature decorative fences. These are perfect for adorning a mantlepiece, a bookshelf, or even a whimsical fairy garden. Just arrange some vertical sticks and glue one or two horizontal sticks across them to get that classic picket fence design.
To add a distinctly Swedish touch, bring in some Dala-style painting. Paint the fences white or a light grey, then add simple, stylised floral or geometric motifs in classic colours like red, blue, and yellow. This small nod to traditional Dalarna artistry connects your craft back to a rich and beautiful heritage.
These small projects can easily be extended to other items, like creating unique gift tags or key rings. For more ideas on crafting personalised accessories, you can find inspiration for a charming key ring DIY project that uses similar principles of simple construction and decorative painting. These small, thoughtful creations are a wonderful way to practise your skills while making something truly special.
You’ve poured your heart and soul into creating something beautiful; now, the final step is to make sure it lasts. Protecting your handcrafted treasures is just as vital as the creative process itself, from the materials you choose to the final protective finish.
Thoughtful care, both during and after creation, is what gives your art its longevity. This journey begins with a safe crafting space. When you’re ready to paint or seal your ice pop sticks, always find a well-ventilated area. This simple step protects you from inhaling fumes from paints, primers, or varnishes.
Choosing non-toxic materials is essential, particularly for any pieces that might be handled often or find a home in a child’s room. It's a mindful approach that's becoming more common in manufacturing, reflecting a wider commitment to both safety and sustainability.
This trend is noticeable in Southeast Asia, where 55% of manufacturers now favour non-toxic glues. This shift is a direct response to 2022 ASEAN standards aimed at cutting chemical use by 30% — a principle that brings to mind the environmentally safe paints used in traditional Swedish arts, like the vibrant Dalaart roosters and moose. You can explore more about these industry shifts and market insights on Industry Research.
Protecting your finished work is the final, crucial step in the creative process. Think of a clear, non-toxic sealant or varnish as armour for your art, shielding it from dust, moisture, and the slow fade of sunlight.
Proper storage of your supplies is just as important. Keep your spare ice pop sticks in a dry, flat container. This prevents them from warping or absorbing moisture, which can ruin them before your project even begins.
For your finished crafts, a clear acrylic varnish in a matte or satin finish will protect the paint without adding an unnatural gloss, preserving the piece’s authentic character. These simple acts of care are what reward your creative efforts with lasting beauty.
As you settle in with a fresh bundle of ice pop sticks, ready to bring an idea to life, a few practical questions almost always come to mind. It happens to every crafter! Let’s walk through some of the most common ones so you can move forward with confidence and create something truly special.
Think of this as a little chat about the nuts and bolts of working with this wonderfully simple material.
Choosing the right adhesive is one of the first and most important decisions you’ll make. The glue is what gives your creation its strength and longevity, ensuring all your careful work holds together just as you intended.
For the majority of your projects, a good quality wood glue or a strong PVA craft glue is your best friend. These create an incredibly strong bond by soaking into the wood fibres just a little, making two pieces act as one. If you’re in a hurry or attaching sticks to something non-wooden like plastic, a hot glue gun will do the trick. Just be mindful that the bond won’t be as permanent or sturdy.
And if you're building something that needs to hold a bit of weight, say a miniature shelf or a decorative frame, I always reach for a two-part epoxy. It’s the ultimate choice for rock-solid structural integrity.
Absolutely, and it’s a fantastic way to get colour deep into the wood. Dyeing gives you a rich, stained effect that lets the beautiful wood grain show through, which is a completely different look from the opaque finish of paint.
To dye your ice pop sticks, all you need is a simple, non-toxic solution of food colouring and water. If you’re after deeper, more rustic shades, you could also try commercial wood dyes. Just let the sticks soak until they’ve reached the colour you love, then lay them out on a wire rack to dry completely before you start building.
Ah, the dreaded splintered edge! Getting a clean cut is much easier than you might think, but it all comes down to using the right tool. Put the kitchen scissors away—they're designed to shear, and they’ll just crush the wood fibres and leave a jagged, messy break.
Your best bet is a pair of heavy-duty craft shears or a sharp craft knife used on a self-healing cutting mat. For the cleanest possible line, I like to score the stick a few times with the craft knife right where I want to cut. After that, it will snap perfectly along the scored line with just a little pressure. A quick swipe with a piece of fine-grit sandpaper is the final touch for a flawless finish.
Ready to start your next creative project? Dalaart offers unpainted DIY models perfect for personalising. Discover authentic, hand-carved Dala horses and more, all crafted in Sweden from sustainable materials. Find your inspiration at https://dalaart.com.


.svg)


.png)


