May 26, 2026
You may be standing in front of your wardrobe wanting something light for summer, but not flimsy. Something elegant, but not mass-made. That's often the moment a crochet pattern dress starts to make sense. You stop looking for the right dress in the shops and begin making the one you want to wear.
A handmade dress asks for more of you than a quick purchase. It also gives more back. You choose the yarn, the drape, the fit, the amount of ease, and the little details that make a garment feel personal instead of replaceable.
The Solsken Dress is built around a Scandinavian way of dressing that values calm lines, practical beauty, and garments worth wearing again and again. It isn't fussy. It isn't trend-chasing. It's the sort of crochet pattern dress that looks at home with sandals in midsummer, with a cardigan on a cool evening, or layered over a slip when the weather turns.
That slow, considered feeling has deep roots in Sweden. The foundation for crochet-style garments in Sweden was laid in the late 19th and early 20th centuries with the rise of flamskvirkning as a recognised domestic craft, taught through national handcraft education and shaped by repeatable motifs and practical geometry that still influence Swedish patterns today, as noted in this history of filet crochet and Swedish handcraft.
Many dress patterns are written as if the only goal is to finish. I don't think that's enough for a garment. A good dress should earn its place in your wardrobe. It should feel lovely to make, easy to style, and sensible to maintain.
The Solsken design follows that thinking:
A handmade dress becomes timeless when you can imagine wearing it in more than one season and in more than one way.
If you're learning with children or want to make crochet part of home life, screen-free crochet fun for families is a gentle companion resource. It's especially useful when you want the craft to feel welcoming rather than intimidating.
Print your working notes if you can. A crochet pattern dress often becomes easier when you can mark rows, circle your size, and jot down changes in the margin. If you keep a printable PDF version of your pattern, add your gauge, yarn details, and any fitting tweaks before you begin. That way, the next time you make it, the pattern already knows you.
A dress begins long before the first proper row. It begins with materials that behave well together. If the yarn is too heavy, the dress can sag. If the hook is too large for your tension, the fabric may become loose where you wanted gentle structure.
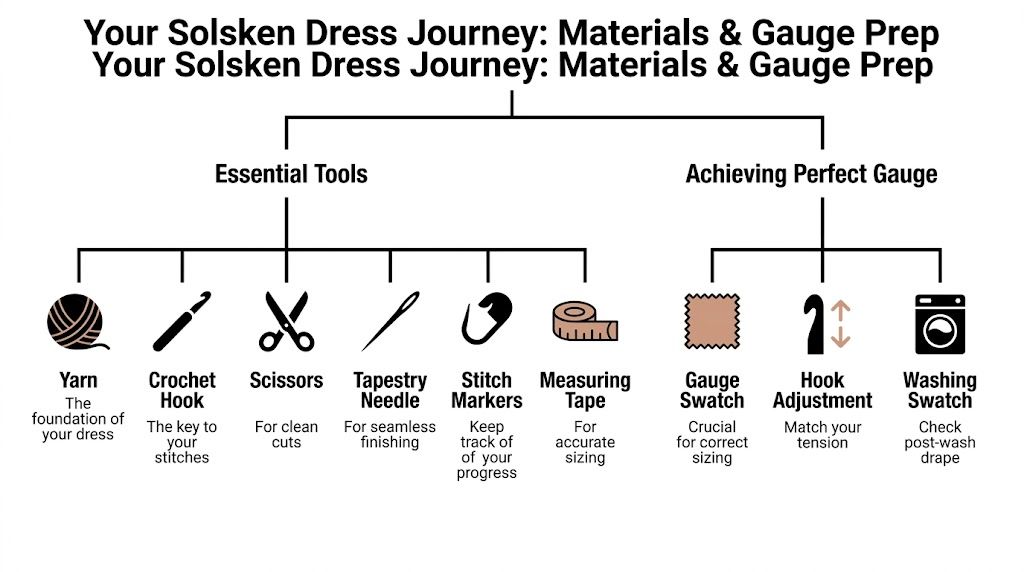
For the Solsken Dress, keep your tool kit simple and reliable:
If you enjoy the craft history around textile making, the tradition of Swedish handcraft culture in Svensk hemslöjd in Stockholm offers useful context for why tools, materials, and technique still matter so much.
A crochet pattern dress lives close to the body, so yarn choice matters more than it does in a cushion cover or market bag. Cotton gives definition and crisp stitch texture. Linen often softens with wear and brings a graceful drape. Bamboo blends can feel fluid and cool, though they may stretch more.
Choose with use in mind. If you want a holiday dress, a smoother plant fibre may be enough. If you want a garment you'll wear often, pick a yarn that can handle washing and movement without losing its shape too quickly.
Practical rule: If you wouldn't want to wear the yarn against your skin for a whole day, don't use it for a dress.
This is the part many makers try to rush. Don't. Expert garment designers stress that the most important step is making a gauge swatch of at least 5 x 5 inches in the exact yarn and hook you'll use, and sizing calculations should be based on the swatch after washing and blocking because that reflects the final garment state, as explained in this guide to crochet garment design basics.
Make your swatch in the same stitch pattern as the dress body. Wash it the way you'll wash the finished dress. Block it. Let it dry fully. Then measure the centre area rather than the edges, where stitches are less stable.
If your swatch is too tight, go up a hook size. If it's too loose, go down. Don't try to “crochet differently” just to match a pattern note. Your hands will revert to their natural tension the moment you relax.
A good swatch isn't wasted time. It's the small piece of work that keeps the whole dress from becoming a near miss.
Sizing sounds mathematical, but it's really just translation. You're translating your body into stitches. Once you understand that, the process becomes much less mysterious.
Start with three key measurements. Take your bust, waist, and hips while standing naturally. Keep the tape level and snug, but not tight enough to compress the body. If you inhale and the tape shifts, relax and measure again.
Fit isn't only about body size. It's about comfort and style.
A dress with negative ease sits closer to the body. A dress with positive ease floats away from it and feels easier for warm weather layering. Neither is better. The right choice depends on the fabric and the look you want.
Think about these questions:
Here's the method that helps most dress makers stop guessing. A standard design approach takes a 40-inch bust, works with half the measurement for the front panel, and uses gauge to find stitch counts. In the example, 20 inches divided by a 4-inch swatch width and multiplied by 10 stitches gives 50 stitches for one panel, or 100 stitches around the full bust, as shown in this crochet garment sizing method.
That same logic works for the waist, hips, and length. Measure. Convert. Check whether your stitch pattern needs a repeat. Then round your count in a way that keeps the motif balanced.
Before you chain anything, write out your starting counts in plain language:
Body measurement
Example, bust front width.
Gauge conversion
How many stitches that width gives you.
Pattern repeat adjustment
If your stitch pattern repeats over a set number, adjust to match.
If the maths gives you a strange number, the stitch pattern isn't wrong and your body isn't wrong. It only means you need to round thoughtfully so the repeats stay even.
A crochet pattern dress transforms from generic instructions into a made-for-you garment.
The Solsken Dress is easiest to build in two visual zones. The bodice creates the fit and line. The skirt controls movement and personality. Work carefully in the early rows and the rest tends to settle into a pleasant rhythm.
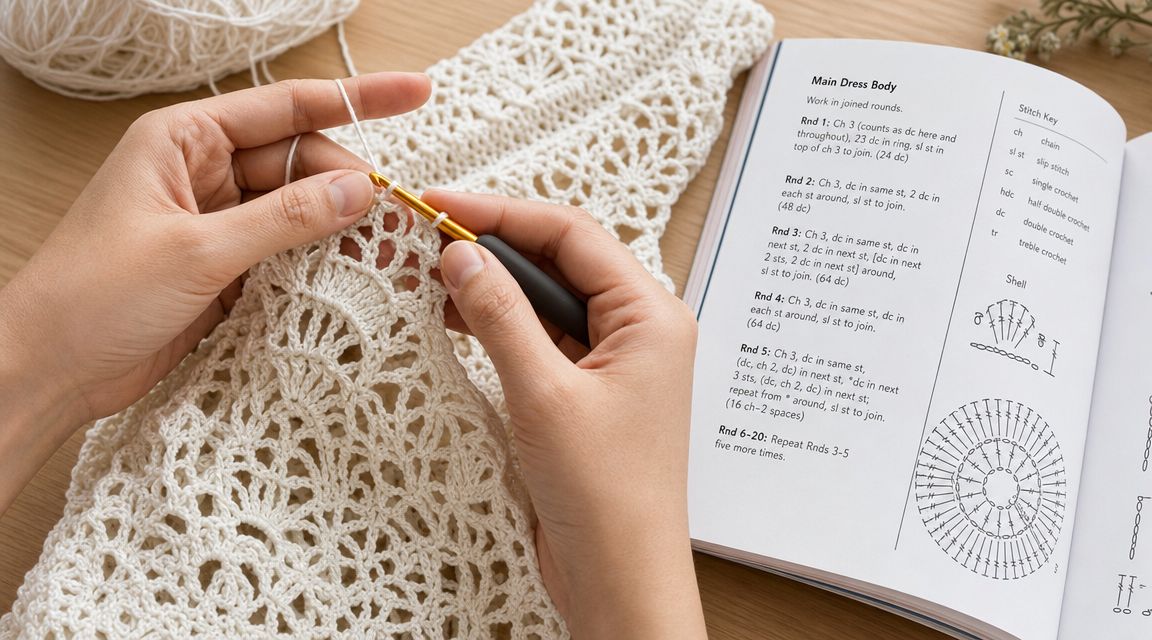
Before you begin, make sure your measurements are nearby. If you want a visual refresher on measuring the body well, this guide to taking clothing measurements is useful because it shows where makers often go off line with the tape. For more garment inspiration in a related style, this crocheted women's top pattern article can also help you think about shaping and wearable proportions.
Use clear stitch notes from the start. For this dress, keep the working language simple:
Because naming conventions vary, write your chosen definitions at the top of your page before Row 1. That single habit prevents a surprising number of mistakes.
Begin with a foundation that matches your calculated stitch count. If you dislike a tight lower edge, use a looser chain or a foundation row method you already trust.
For the first part of the bodice:
If your dress has bust shaping, place it where your body needs it, not where you assume it should go from a mannequin photo. Try the piece against a well-fitting slip or top if that helps you see the line more clearly.
Many makers can form the stitches correctly but still end up with a body panel that leans or ripples. That usually comes from one of three things:
Check your stitch count at the end of every row set, especially during shaping. It's much easier to correct a small error close to the point where it appeared.
Count when the row still feels fresh in your hands. Waiting until several rows later makes the fix harder than it needs to be.
A visual walkthrough can help once the fabric starts taking shape:
Once the bodice sits well, the skirt becomes a matter of drape and rhythm. A straight skirt works beautifully in Scandinavian styling because it lets texture and line stay clean.
To build a simple skirt:
If the skirt begins to flare when you wanted a straighter fall, look first at your tension. Many crocheters loosen unconsciously once the repetitive section begins. If your lower rows are visibly airier than the bodice, that's often the reason.
A good main body doesn't need to be complicated. It needs to be consistent.
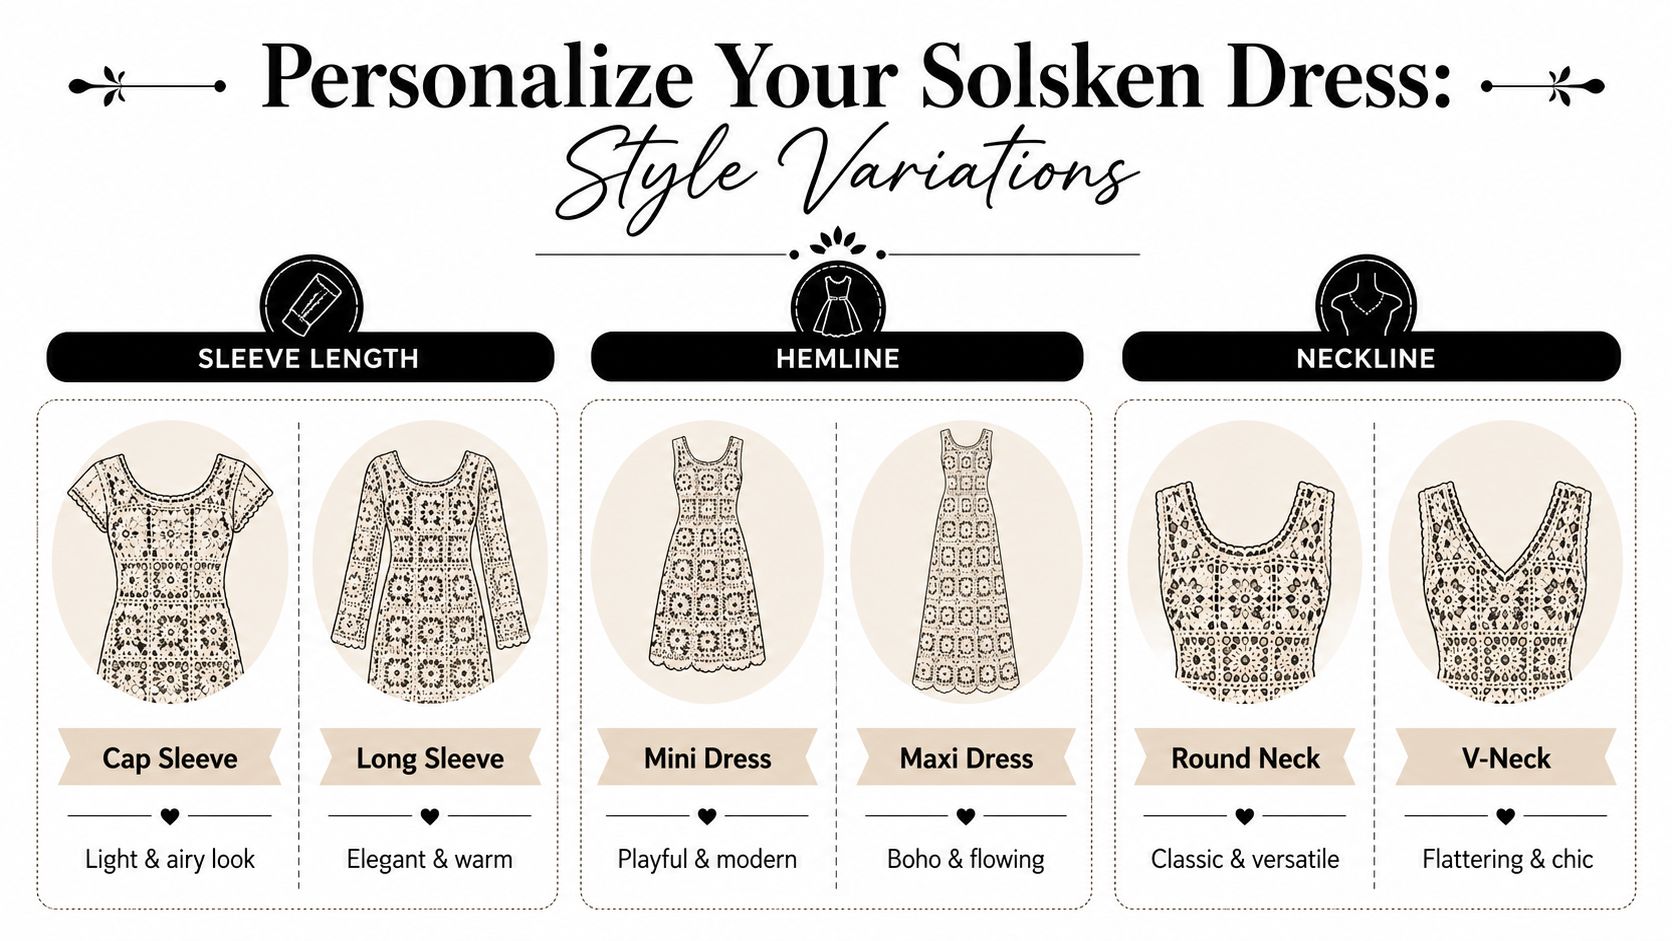
The base Solsken Dress is intentionally calm. That makes it a strong foundation for variation. Small changes in armhole treatment, skirt shaping, or neckline can shift the entire mood of the garment without forcing you to learn a completely new pattern.
If you enjoy clothing that balances simplicity with personality, Scandinavian wardrobes offer a useful visual reference. This look at Scandinavian style clothing captures the preference for clean silhouettes, thoughtful layering, and pieces that stay relevant beyond a single season.
A sleeveless version keeps the dress airy and easy to layer. It also puts more attention on the armhole finish, so neat edging matters.
For this variation, reduce bulk around the upper body and finish the armholes with a stable edging row or two. If the armhole gapes, the issue usually isn't the edging. It's often that the opening was cut too generously in the shaping stage.
This option suits:
An A-line skirt gives the dress a softer swing. It's forgiving, comfortable, and often easier to wear across different settings because it doesn't cling.
To create it, add increases at measured intervals after the waist or high hip. Keep the increase points symmetrical so the hem falls cleanly. If your stitch pattern has a repeating motif, place increases where they won't interrupt the design too abruptly.
The reason this variation works so well is simple. It lets the body stay defined while giving the lower half space to move.
Some dresses look best on the hanger. An A-line dress often looks best in motion.
A fitted version asks more of the pattern and more of your finishing, but the result can be striking. This style depends on controlled decreases, thoughtful ease, and yarn that won't collapse under wear.
For a fitted crochet pattern dress:
This version is best if you enjoy a body-skimming line and don't mind a bit more measuring during the process. If the fabric is open or lace-heavy, consider whether lining will improve both comfort and confidence.
Finishing is where the dress stops looking handmade in the casual sense and starts looking carefully made. This stage deserves patience. A beautiful garment can lose its polish through rushed ends, uneven edging, or blocking that's skipped because the dress already “looks fine”.
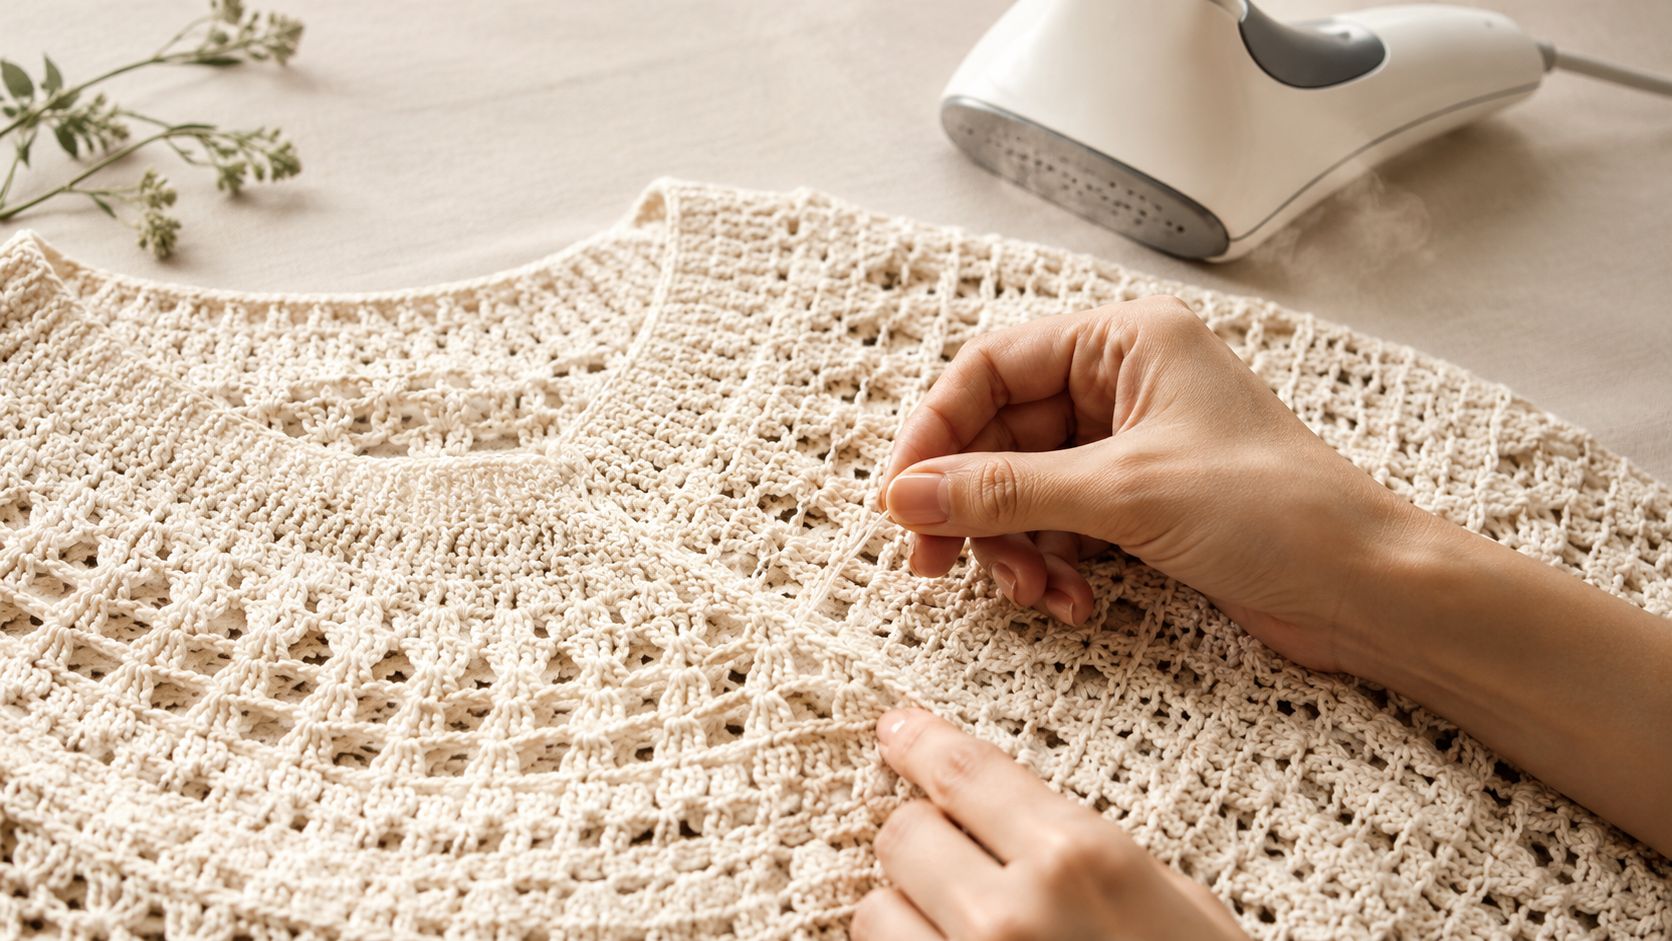
Thread each yarn tail through the path of the stitches rather than dragging it straight across the back. Change direction once or twice if the fibre allows it. That small turn helps anchor the end and makes it less likely to work loose with wear.
Pay attention to high-stress areas such as underarms, straps, side seams, and waist shaping. Those parts move most. They need secure finishing, not quick finishing.
Blocking matters even more in garments than in blankets. It settles the stitch pattern, evens the line, and lets you see the true drape of the fabric.
Use the method suited to your yarn:
Lay the dress flat to dry in the measurements you want to keep. Don't stretch it beyond reason just to chase a size or shape the crochet didn't naturally produce.
A dress can look perfect when you're standing still and still fail in real life. Beyond static measurements, true fit shows itself when you sit, raise your arms, and bend. Those movement tests help you spot strain points, gaps, and coverage issues, especially in open-back styles, and they also show why structure, drape, and lining often matter more than stitch pattern alone for daily comfort, as discussed in this video on crochet dress fit in movement.
Check these final details before calling it done:
A tie, a modest button closure, or a light lining can turn a pretty dress into a reliable one.
Every dress teaches something. A curling edge teaches you about tension or border balance. A drifting stitch count teaches you to mark repeats earlier. A stretched neckline teaches you that not every soft yarn belongs in every garment.
Treat these issues as adjustments, not failures.
If your edges curl, check whether your foundation is tighter than the rows above it. If your count is off, go back to the last point where the motif looked balanced and recount there. If you spot a mistake a few rows below, don't always rip everything out at once. Sometimes you can carefully drop down and repair the problem area with a hook.
When the dress feels slightly awkward on the body, the answer may not be more shaping. It may be better finishing, a steadier seam, or a lining that helps the fabric behave.
Durability matters as much as style, especially in Nordic conditions. Guidance for crochet dress longevity increasingly points towards patterns and finishes that can handle repeated wear and washing, with fibre blends, reinforced seams, or lining options helping manage moisture and reduce stretching over time in a culture that values longer product life and circularity, as discussed in this overview of crochet dress pattern durability.
For regular care, keep the routine gentle:
The best crochet pattern dress is one you'll keep reaching for, not one you're afraid to wear.
If Swedish craft traditions speak to you beyond yarn and garments, Dalaart is worth exploring. Their collection of hand-carved and hand-painted Swedish folk art carries the same spirit of patience, material honesty, and heritage that makes slow fashion so meaningful.


.svg)


.png)


